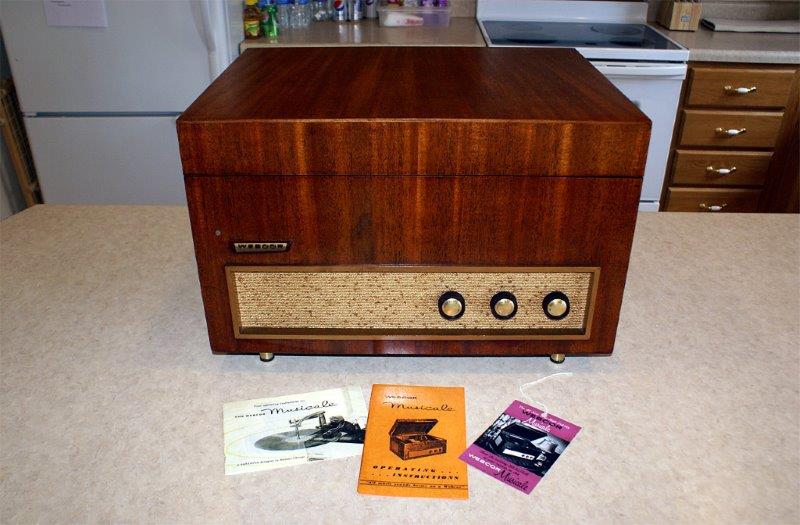
Vintage Webcor MT-1655-01 High Fidelity Record Player
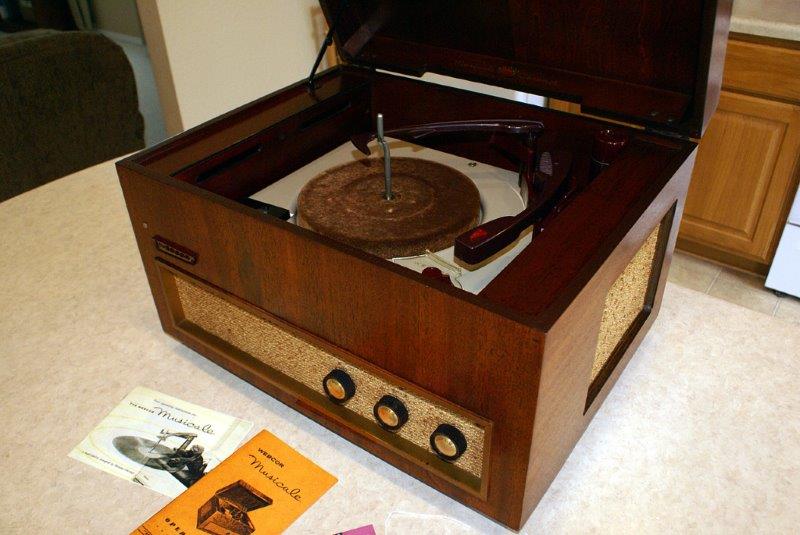
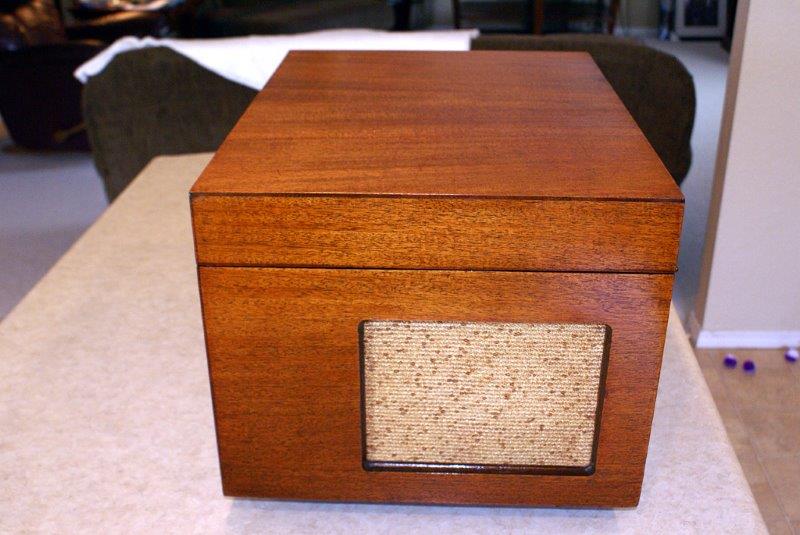
Above, the Webcor Musicale Coronet model MT-1655-01 record player, before restoration.
Overview
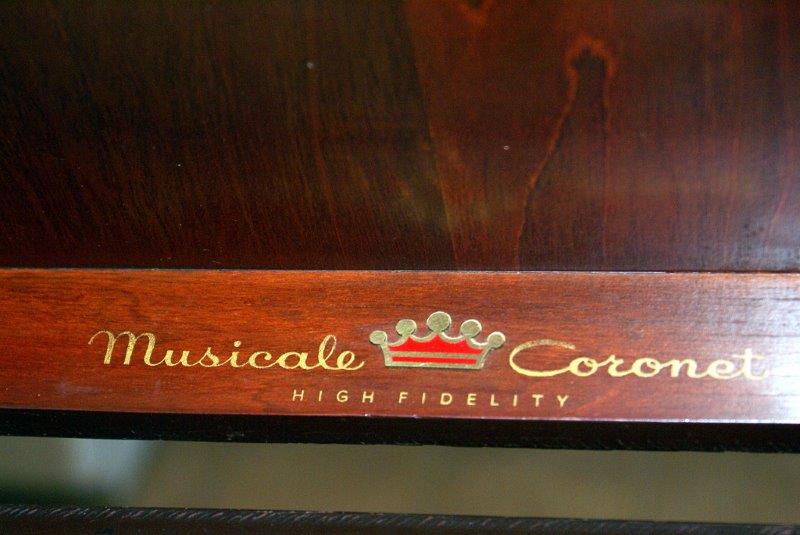
Originally introduced in the latter part of 1954 and produced through 1956, the "Musicale Coronet" was the top-of-the-line table-model high fidelity record player offered by the Webster Chicago Corporation (aka "Webcor"). Improvements over Webcor's earlier "Musicale" models included separate bass and treble controls rather than a single "tone" control, a much improved magnetic phono cartridge, capable of a wider and cleaner frequency response compared to the previous ceramic or crystal cartridge offerings, and finally, the "Magic Mind" record changer - capable of not only playing a stack of intermixed records of different sizes, but of different speeds as well. That's right, the Musicale Coronet's record changer offered the ability to change its own speed to automatically play a mixed stack of LPs and 45s! Add to this a stout "push-pull" five-tube amplifier, a beautifully veneered real mahogany cabinet, a three-speaker sound system and much more, the Webcor Musicale Coronet was indeed the "Crown Prince" of mid-fifties table model record players. Selling for an average "street price" of $150 back then (equivalent to over $1,300 in 2014 dollars!), the Musicale Coronet was a significant purchase, but well worth it for music lovers who wanted the very best.
Restoration Notes
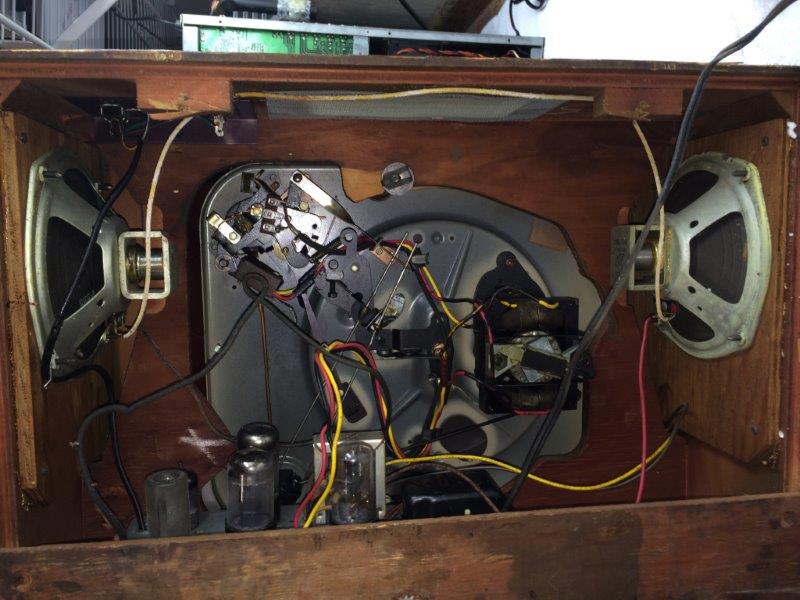
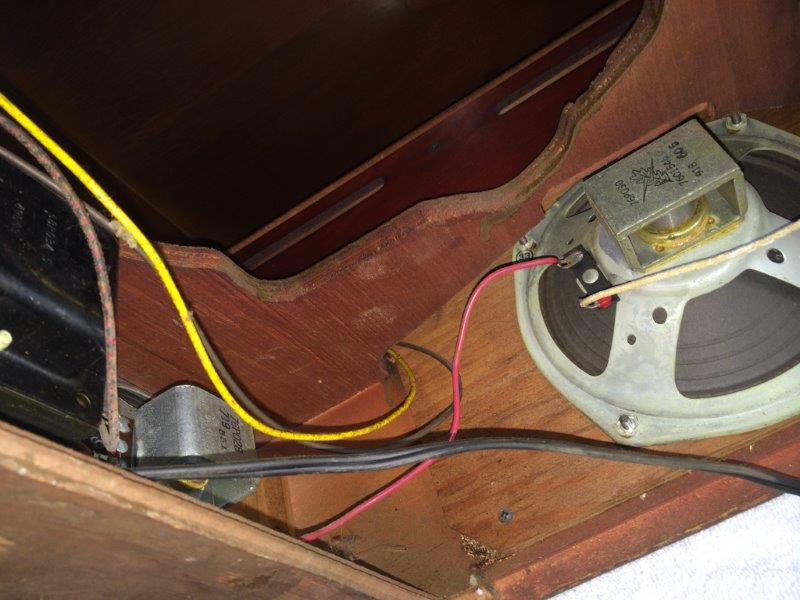
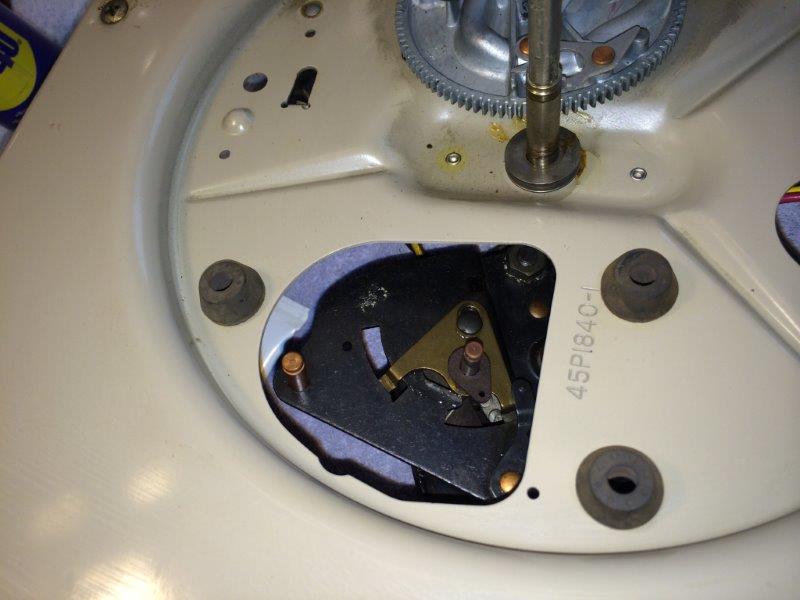
Above is a photo showing the bottom panel removed. Built in Webcor's Chicago Illinois facility during the mid-fifties, the Musicale Coronet MT-1655 employed a monophonic 5-valve amplifier utilizing two 12AX7 tubes in a dual-stage preamplifier, with matched 6V6GT tubes in a push-pull configuration to comfortably yield a clean five-watt output power. Three speakers were mounted in the cabinet; one 4" diameter 'tweeter' mounted in the front panel dedicated to reproducing mid and high frequencies, and two larger 6" 'woofers' mounted on the sides to reproduce lower bass frequencies.
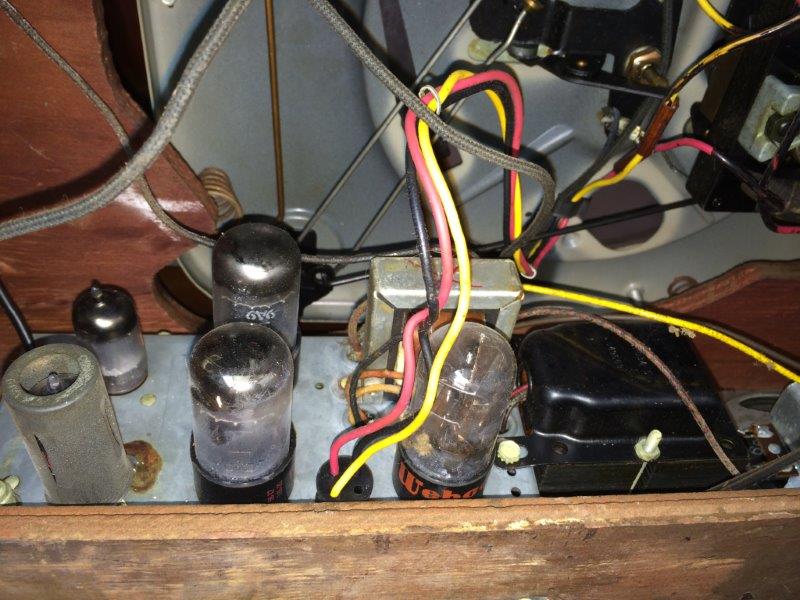
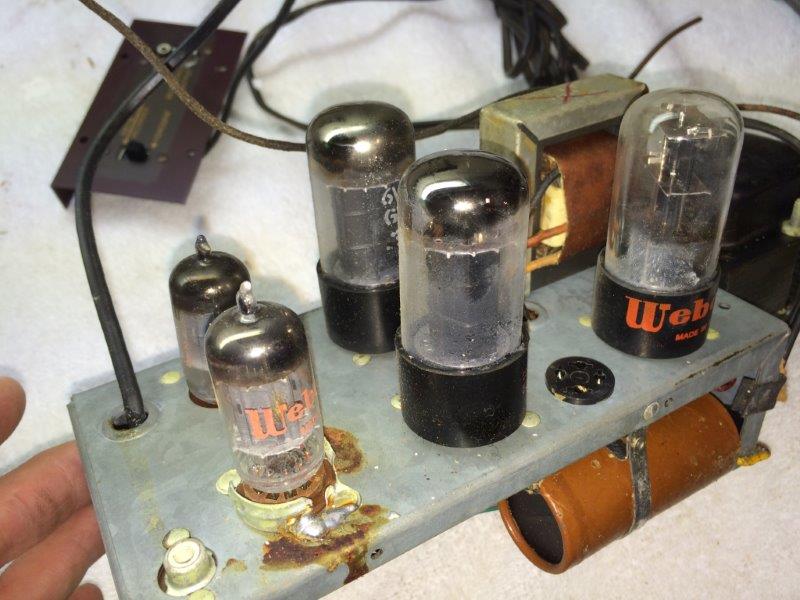
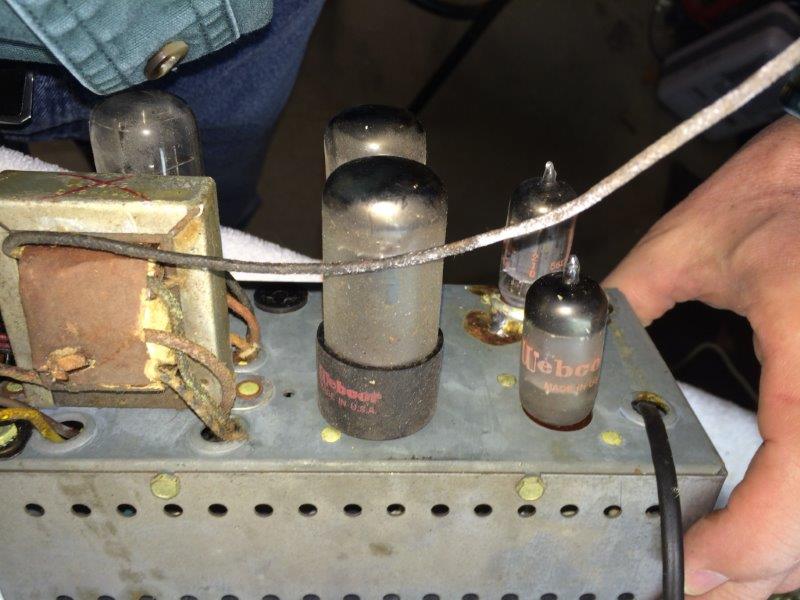
Here's a detail shot of the Webcor tube amplifier, which still boasts its original factory-issued vacuum tubes. Remarkably, even after almost 60 years, the amplifier still works, though the controls are a bit "scratchy" sounding when turned. There's also some background static evident when the treble control is turned up, and there's a noticeable background hum even with the volume turned all the way down.
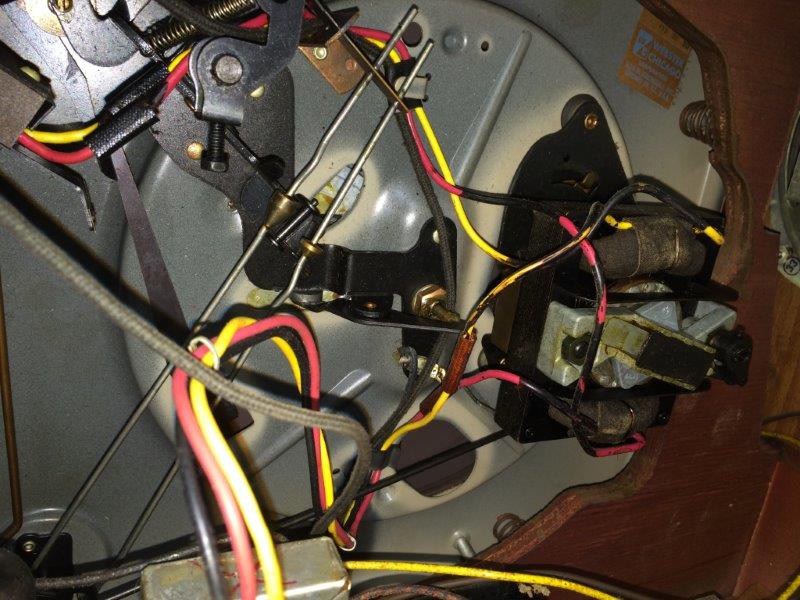
We're looking at the underside of the record changer in this photo. Note the heavy-duty all-metal construction of everything in sight. Note also the rugged 4-pole AC synchronous motor in the right side of the frame - they certainly don't make 'em like this anymore!
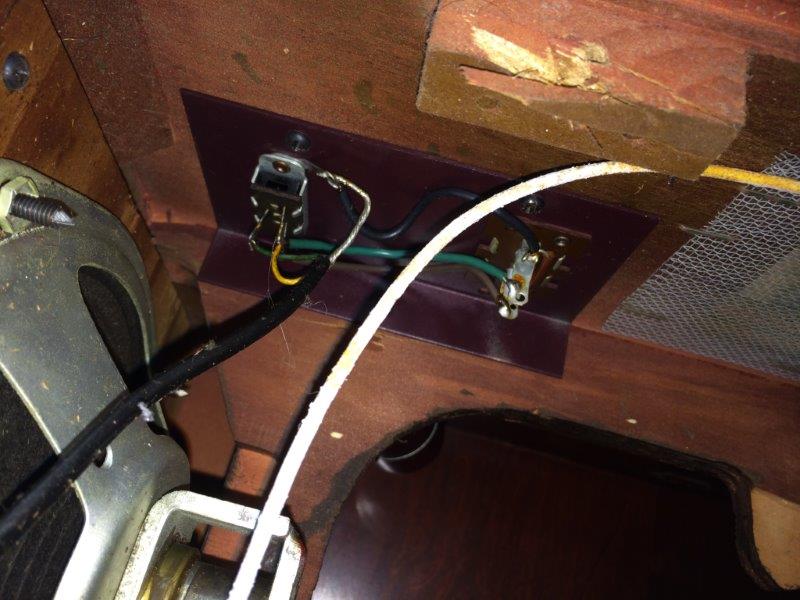
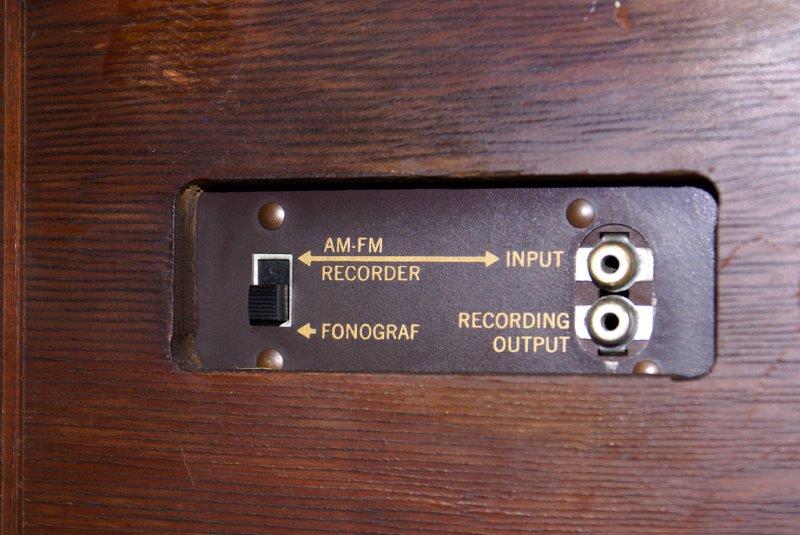
A shot of the rear input/output jack panel. These jacks are a very nice little perk, giving users the ability to record LPs directly to a tape deck, or, with the flip of a switch, allowing users to play external source material through the Webcor's amplifier and speakers. You can even play your iPod through this unit!
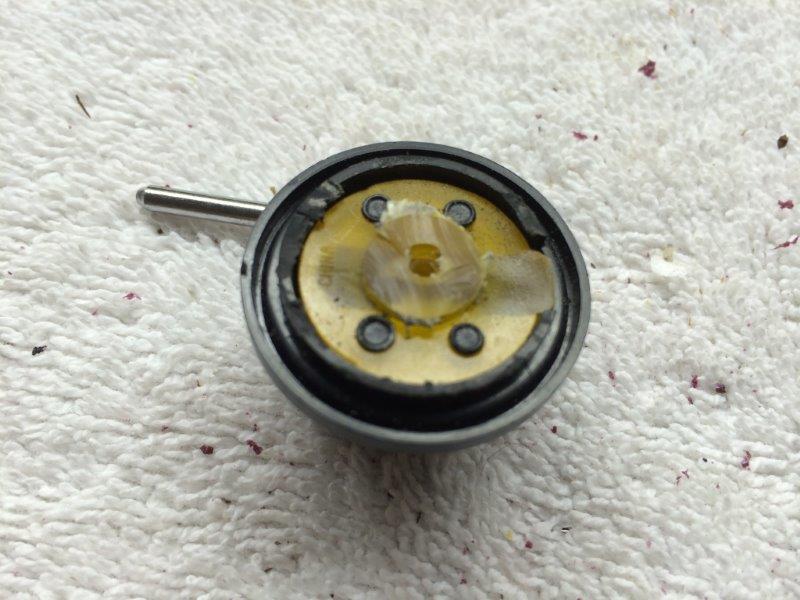
A shot of two of the speakers, the smaller front-firing "tweeter" and one of the side-firing Oaktron "woofers".
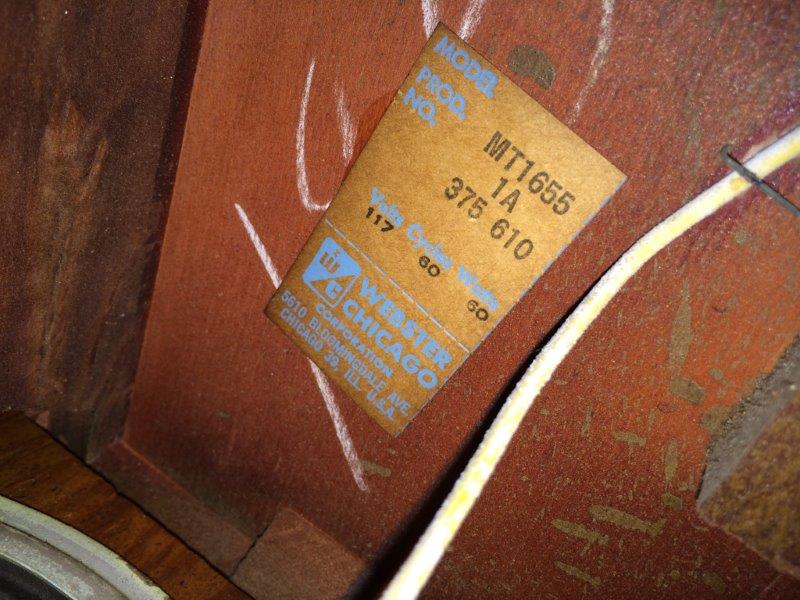
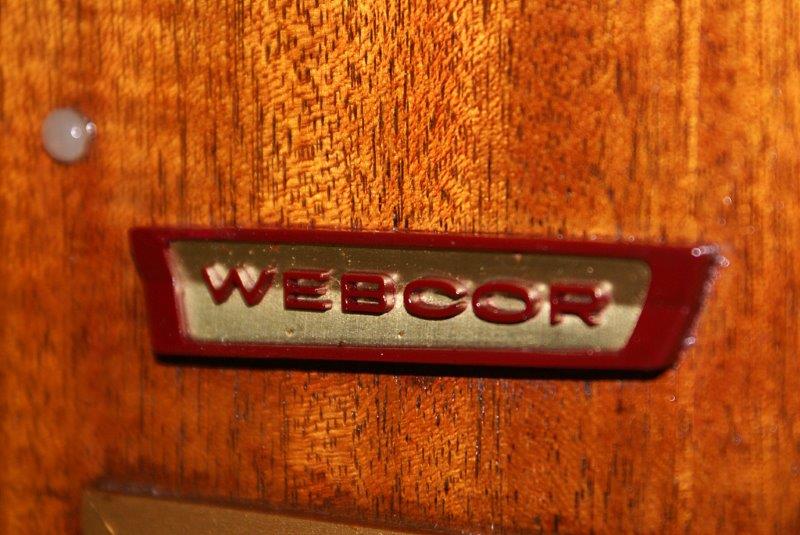
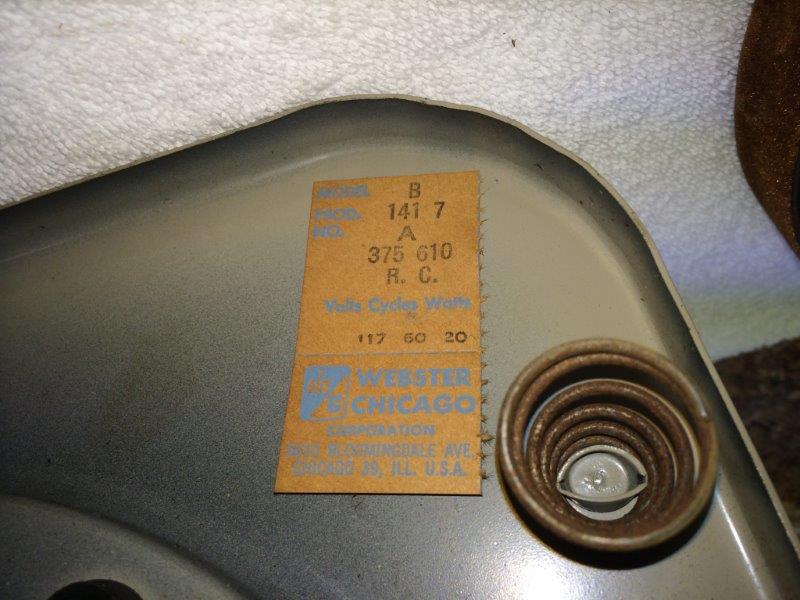
The tag identifying the model and manufacturer of the record player. The "375-610" code indicates that this player was manufactured by Webcor during the 10th week (March) of 1956. Also note the two-digit Chicago ZIP code on the tag - back in the mid-fifties, that's all the location data the USPS needed!
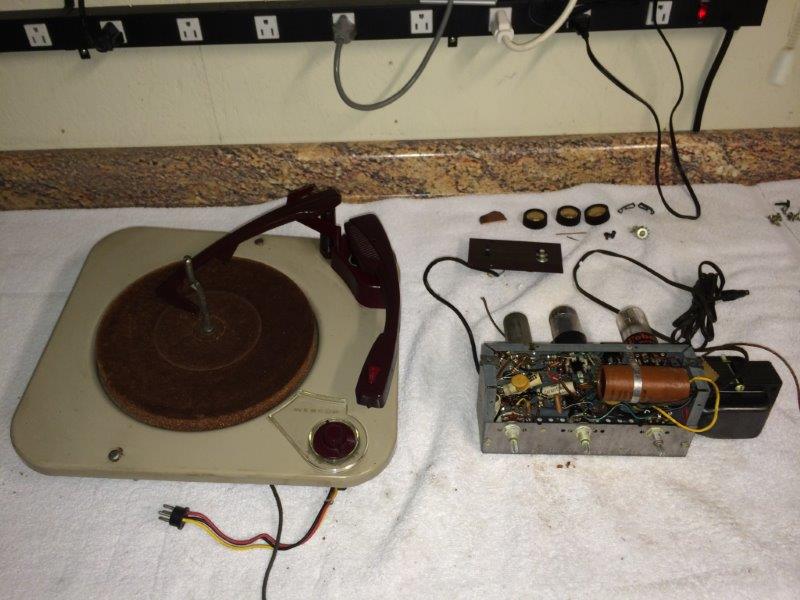
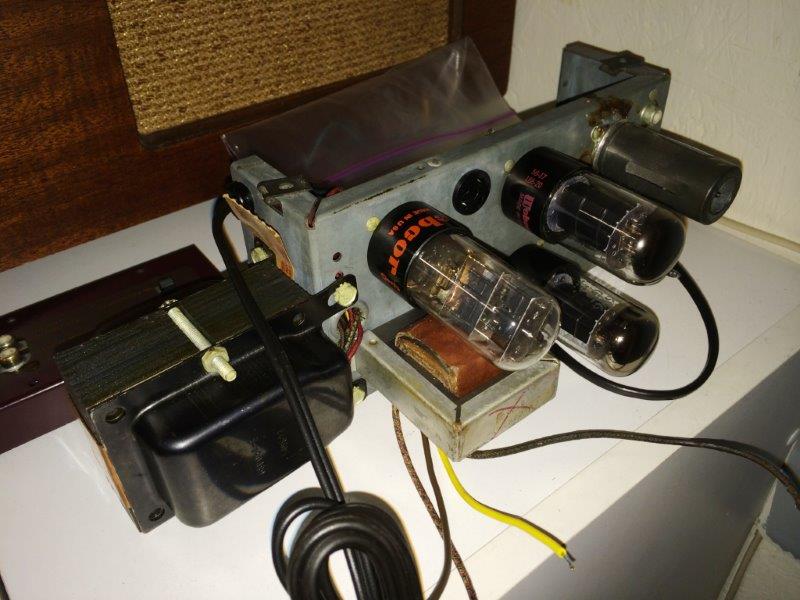
Here are the main components - the record changer and amplifier, removed from the cabinet.
Here's a close-up of the amplifier chassis. The two smaller tubes are for initial stage amplification; the larger tubes in the middle are the final amplification stages for driving the speakers, and the large tube on the right is the rectifier - for converting the AC supply voltage into the DC supply required by the amp circuitry. The large tan cylinder on the chassis' underside is a multi-section filter capacitor, whose main job is to filter hum out of the DC supply voltage. Unfortunately, after almost 60 years, this filter capacitor isn't doing as good of a job as it once did...
Same amp, different side. A little dusty, but no obvious chassis corrosion - all things considered, she's in VERY nice shape.
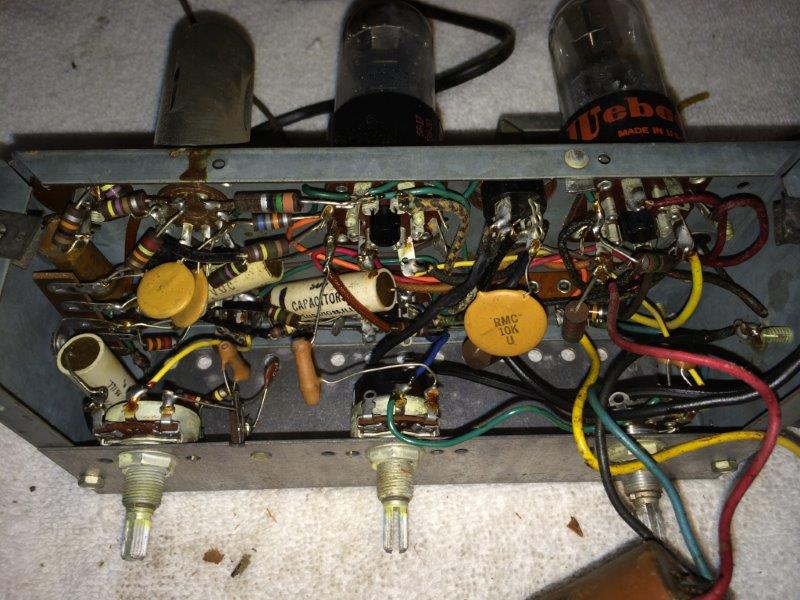
The underside of the amplifier's chassis, showing rotary controls and internal components. The large cylindrical filter capacitor has been moved out of the way to afford a better view of the internals. While we have easy access to them, the three rotary controls are blasted with Deoxit Faderlube F5 control cleaner/lubricant. This sluices out the accumulated gunk and oxidation causing the scratchy noise in the speakers when the controls are turned. A few shots of the cleaner in combination with working each control back and forth a few dozen times, and they work like new - without a trace of noise or static.
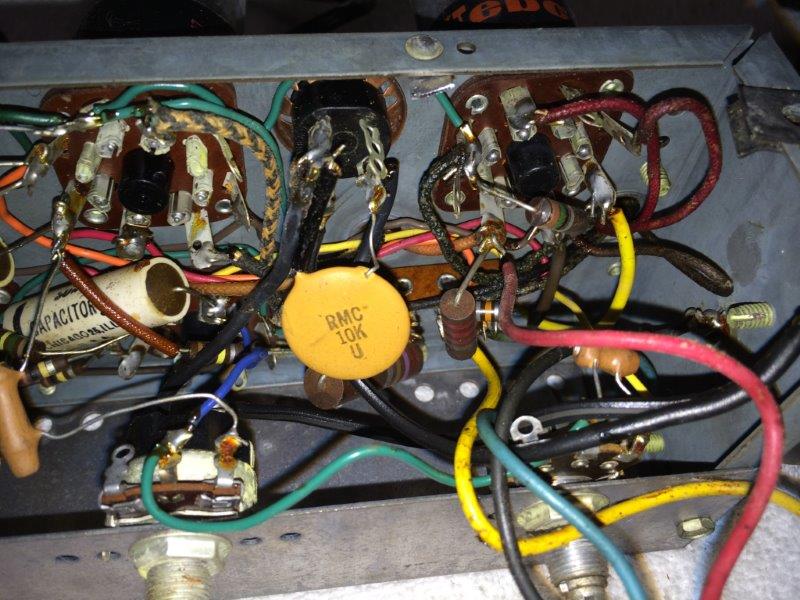
A close-up shot, showing the circuitry associated with the volume control (left) and treble control/power switch (right).
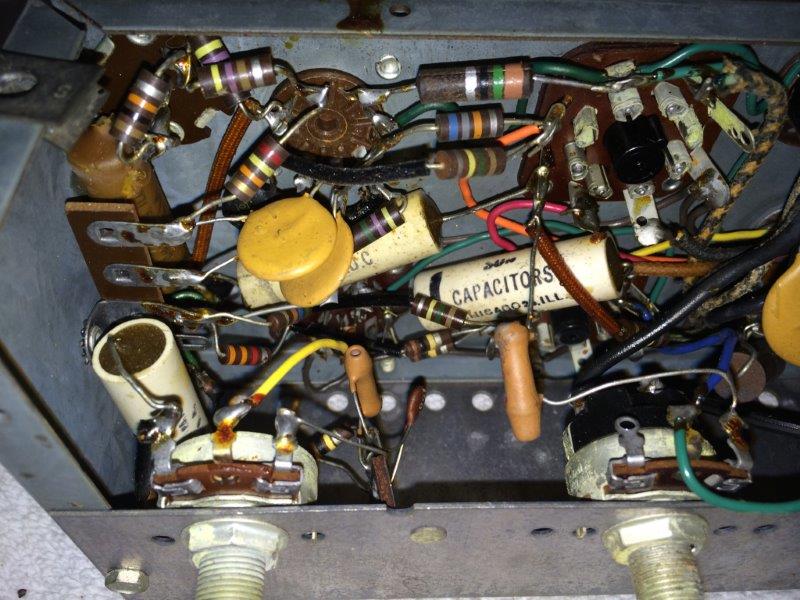
And a detail shot of the rest of the circuitry, for the bass control and power supply. Notice the cloth insulation around some of the wiring - pretty cool!

A photo of the tag identifying this particular amplifier's chassis.
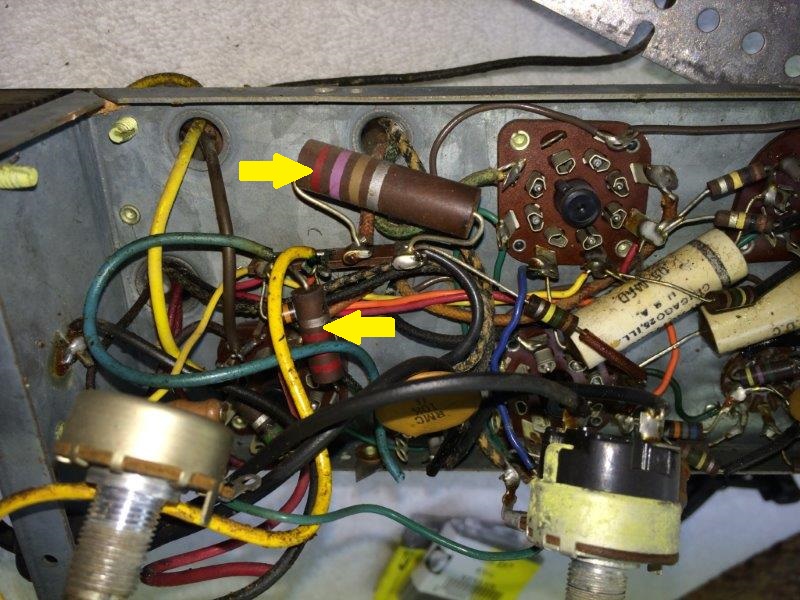
A photo of the power supply circuitry from a different angle. The large high-power resistors (see yellow arrows) usually take a beating over the years and fall out of tolerance. These will need to be replaced.
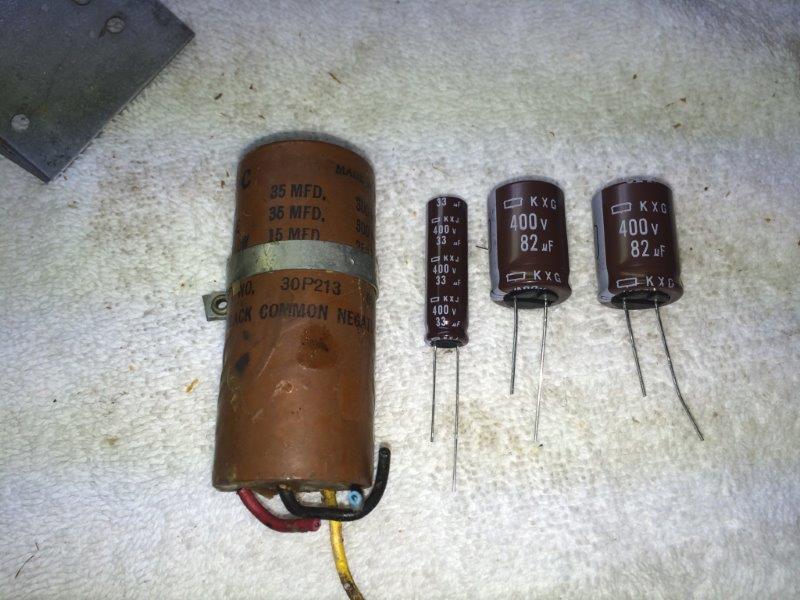
Here's the original multi-section filter capacitor, responsible for the hum problem we have with the amplifier. There are actually three capacitors in the single housing: two capacitors rated at 35µF and one rated at 15µF, all designed to handle up to 300 volts DC. The discrete replacements at right provide twice the hum filtering capability, handle much higher voltage, and take up about a third of the space of the original. Gotta hand it to modern technology...

Here, the replacement parts have been installed - the three filter capacitors, and the two power resistors. The new resistors, though much smaller than the originals, handle significantly more power, and are far less likely to drift off value.
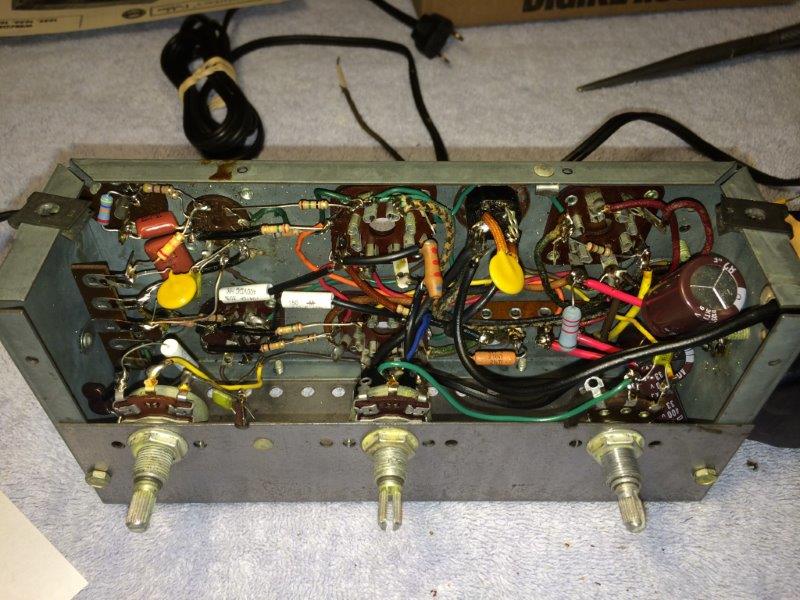
After a few additional measurements, it became apparent that virtually all of the rest of the resistors and capacitors in the amplifier were out of tolerance, some ridiculously so - which likely accounted for some of the excess background noise. To ensure this amplifier could provide the best sound possible, new replacements for all components were ordered and installed. Above is a photo of the amp with all of the new parts in place. Since modern components are quite a bit smaller than the originals, there's quite a bit more breathing room inside the chassis - always a good thing. Now, it's time to take a look at those 58-year old vacuum tubes...
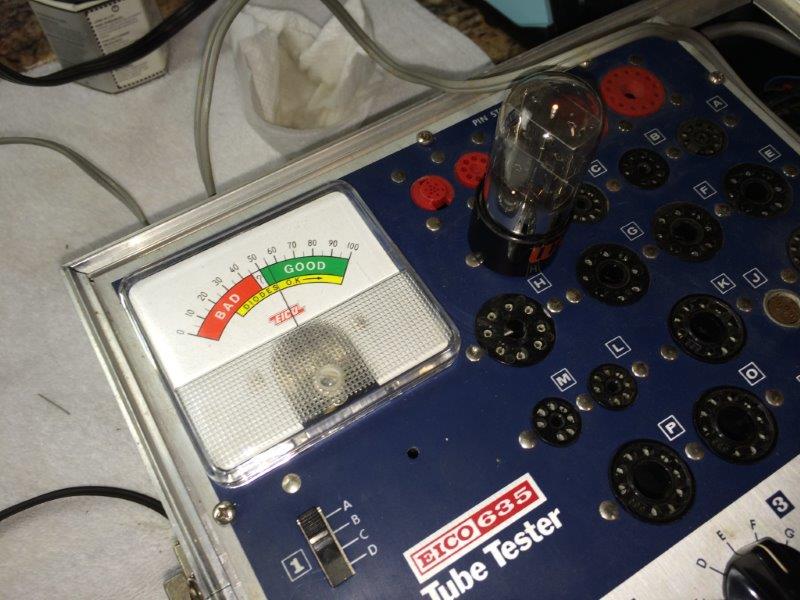
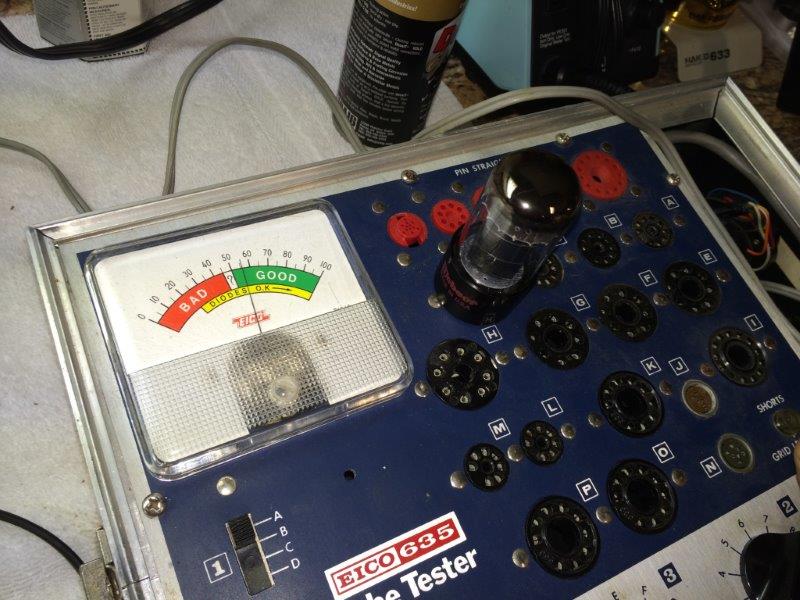
The 6X5GT rectifier tube tests good. Since it's actually a diode, we look at the yellow "Diodes O.K." scale on the tester.
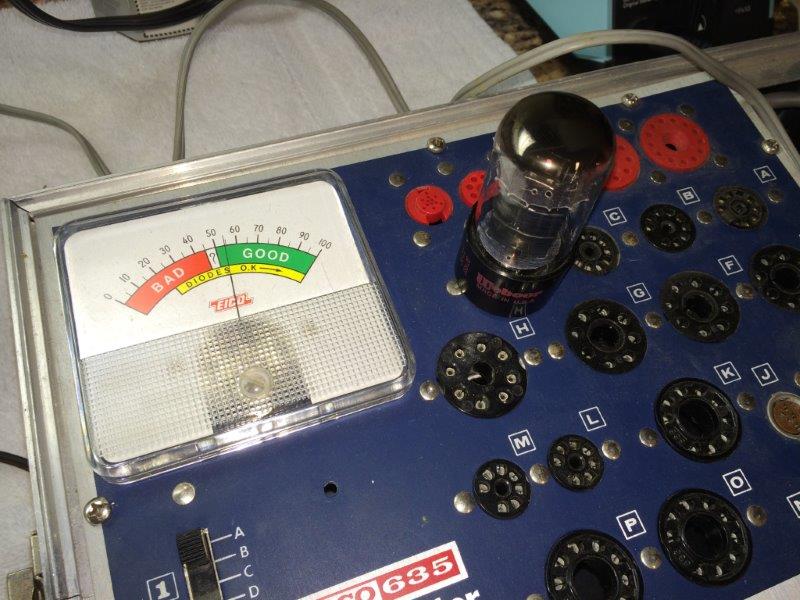
Testing the first 6V6GT power output tube. It tests in the green "Good" range, but just barely. This is just fine. If you were to turn the volume all the way up, you might detect just a hint more distortion than you would with a brand new tube, but for anything less than 100% output, you'd never hear a difference. Besides, most replacements available today are manufactured in China or Russia, and are considered inferior in quality to these vintage American-made tubes.
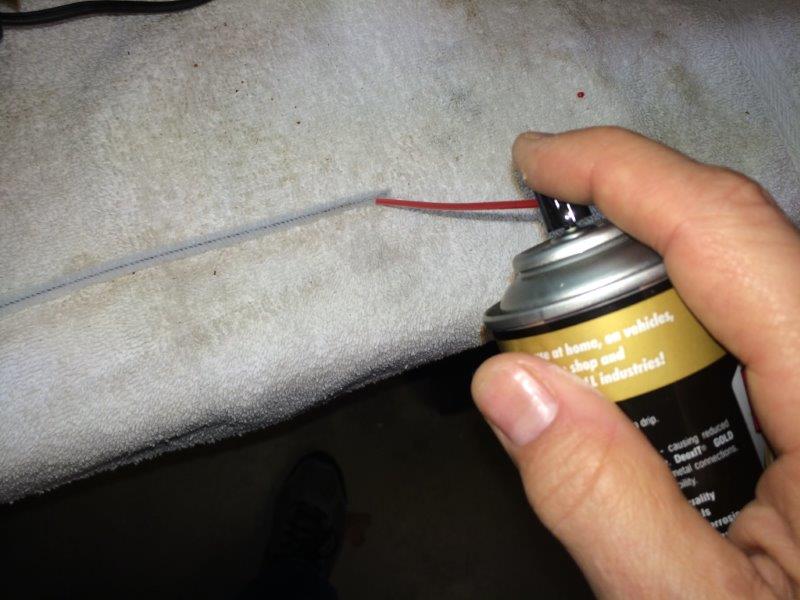
After each tube is tested and before it's replaced, the terminals in its tube socket are thoroughly deoxidized and preserved with a top-quality contact cleaner (Caig Deoxit G5 Gold). First, the cleaner is sprayed onto a pipe cleaner...
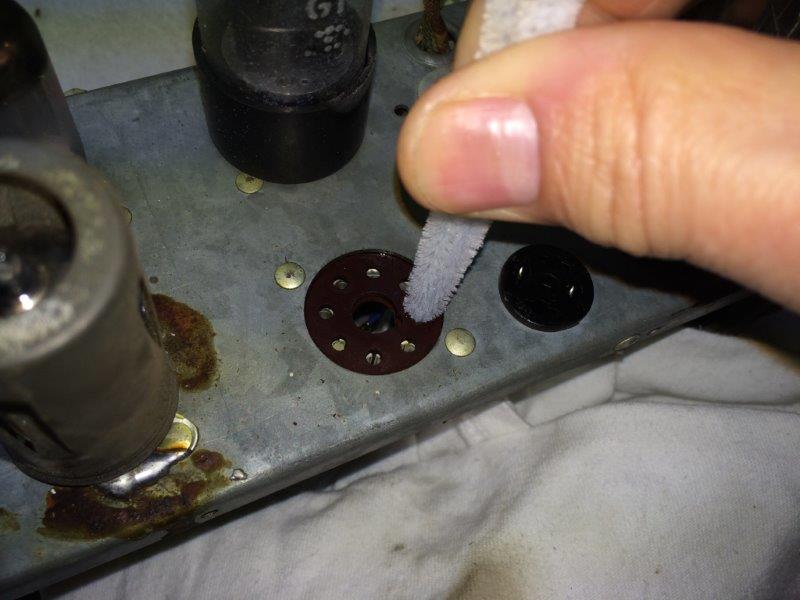
...which is then worked vigorously into each and every pin receptacle. This ensures optimal contact with the tubes' pins, which reduces noise and static while preventing future connection-compromising oxidation. Each connection in every tube socket is cleaned and preserved in this manner.
The tube is carefully cleaned before it is re-installed.
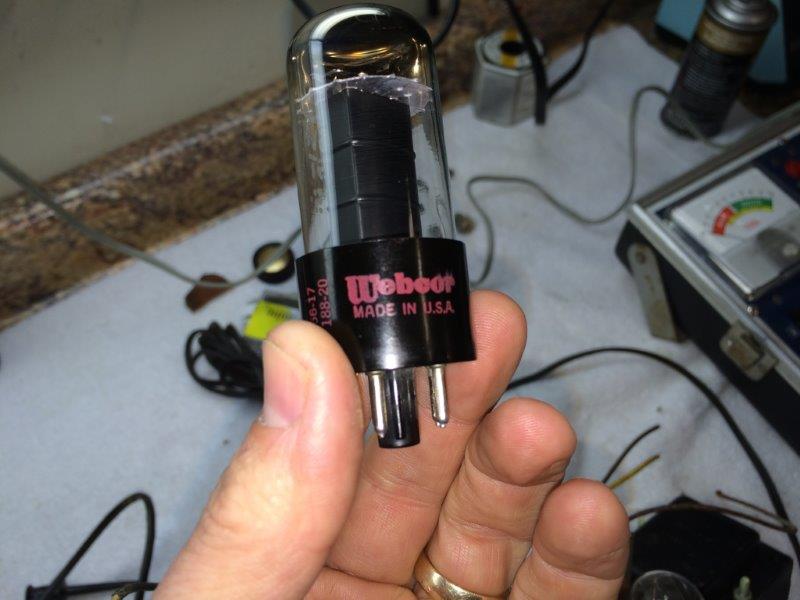
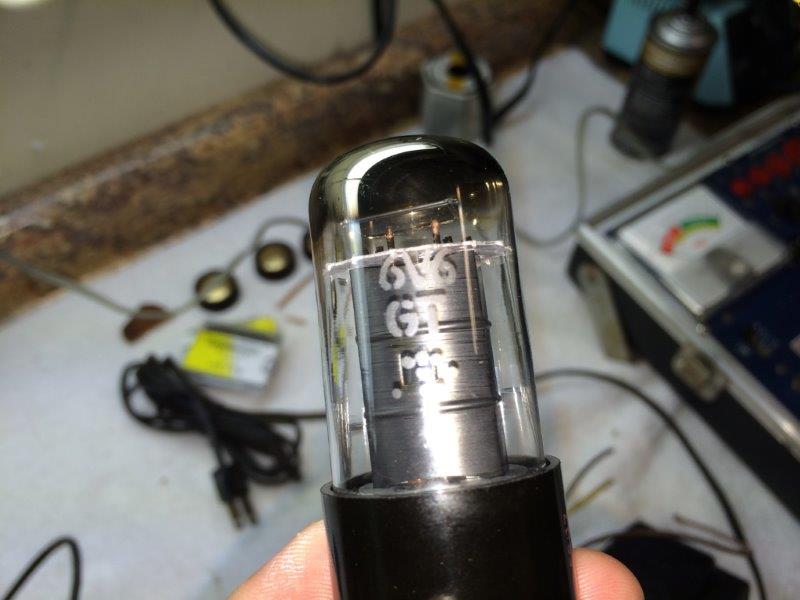
Another shot of the 6V6GT output tube. Original Webcor-branded, and yes, made in the U.S.A.! This tube alone is worth $15-$20 in today's vintage tube market.
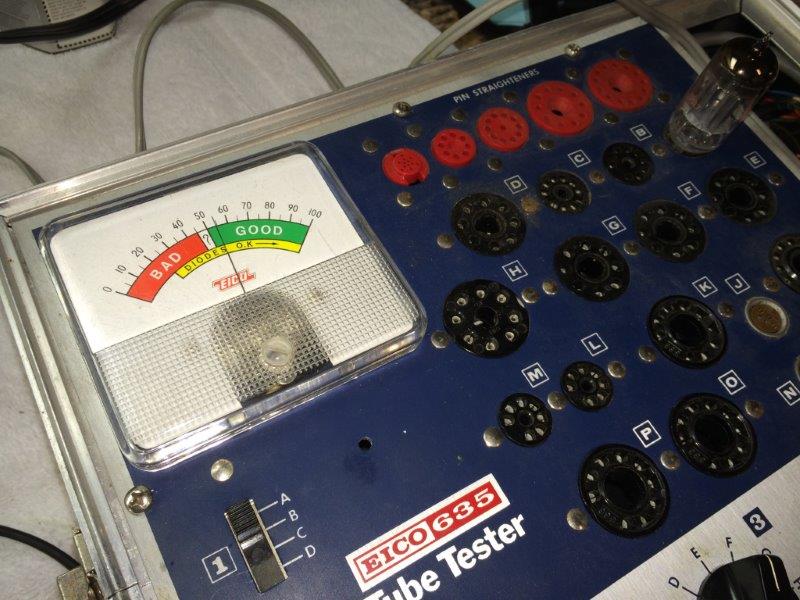
Testing the second 6V6GT power output tube - which also tests in the "Good" range, and is well matched to its twin. This is good - we want our output tubes to be well-balanced, and they are.
Testing the first of the 12AX7 preamp tubes - still good, which is fortunate. Exact U.S.A.-made Webcor 12AX7's average between $20 and $50 each on eBay!
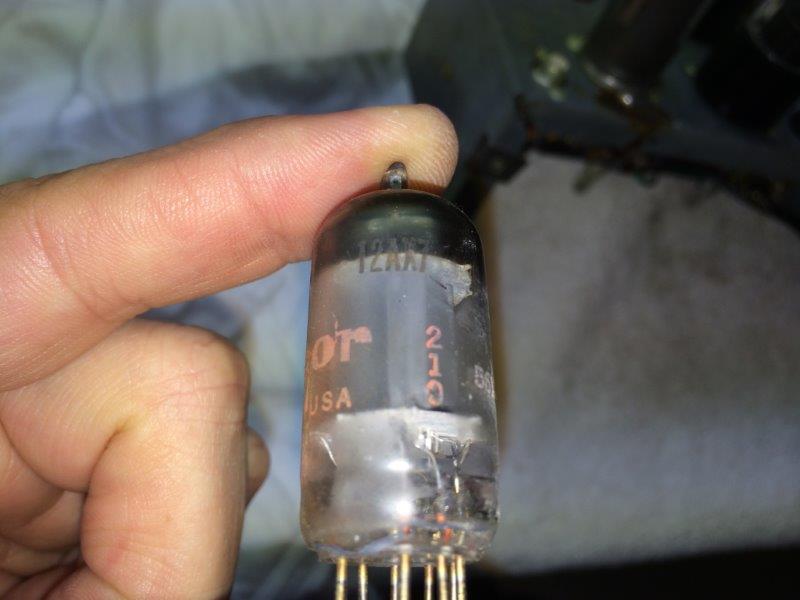
A detail shot of one of the two 12AX7's, showing the manufacture code.
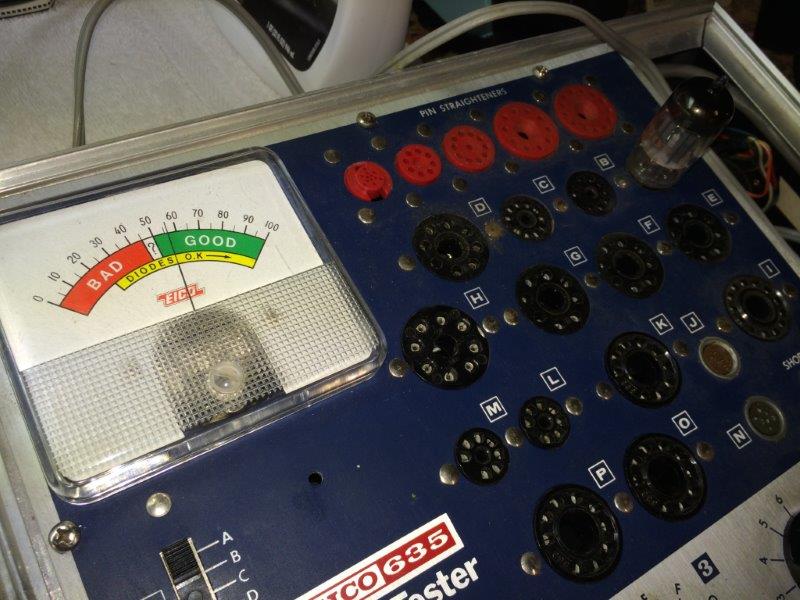
And the second 12AX7 preamp tube also is in the green - more good news. The fact that all tubes are original, AND still test good is strong evidence that this record player didn't see much use, and therefore wasn't subject to the wear and tear one would would expect from a player of this vintage. A quick test of the amp confirms that the background hum and control scratchiness is completely gone, and the sound quality is wonderful - so let's put her on the 'scope and see what she can do....
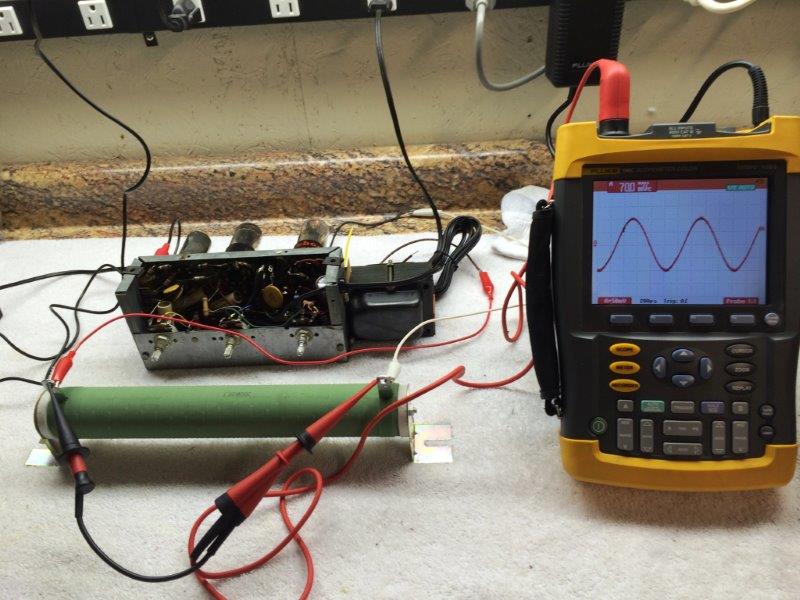
This is the test set up - we're applying a 100 Hz tone to the input of the amplifier and simulating a real-world speaker by connecting the amp's outputs to a large 8-Ohm load resistor. We will increase the volume until the sine wave on the 'scope starts to distort, then we'll back it off and note the maximum RMS AC voltage yielding a clean sine wave. This will be our maximum undistorted output for the amplifier.
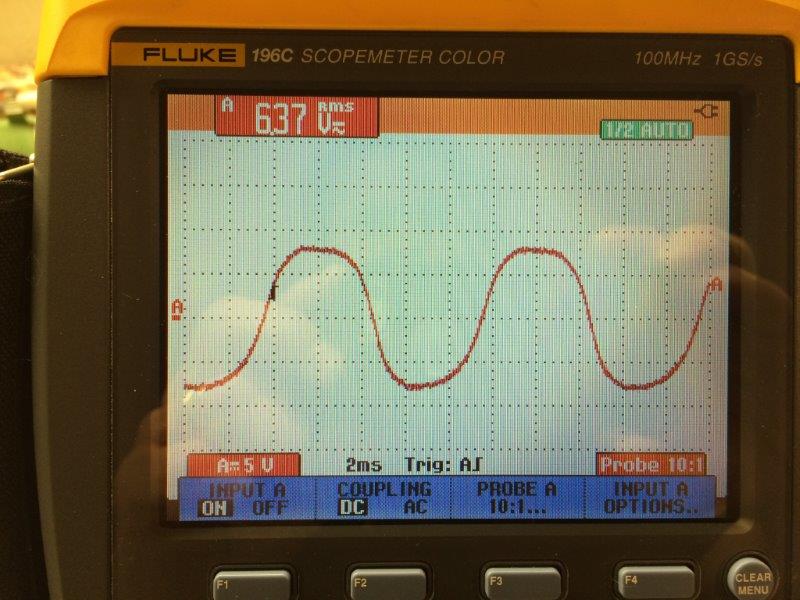
Here's our 100 Hz waveform, just beginning to display a touch of asymmetry. Our output voltage measures 6.37 VRMS into an 8-Ohm load, and since P = (VRMS)2 ÷ R, our output power = (6.37)2 ÷ 8, or 5.1 Watts. So, it looks like our 5-Watt amp is delivering what it advertises - at least at 100 Hz, anyway.
Here's the cleaned-up amplifier, ready for service. On to the record changer!

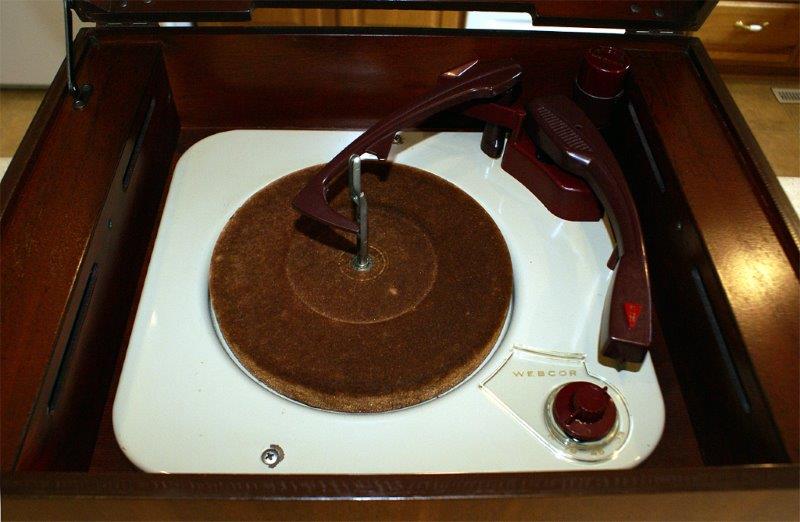
Here's the record changer with the platter and rubber drive ("idler") wheel removed.
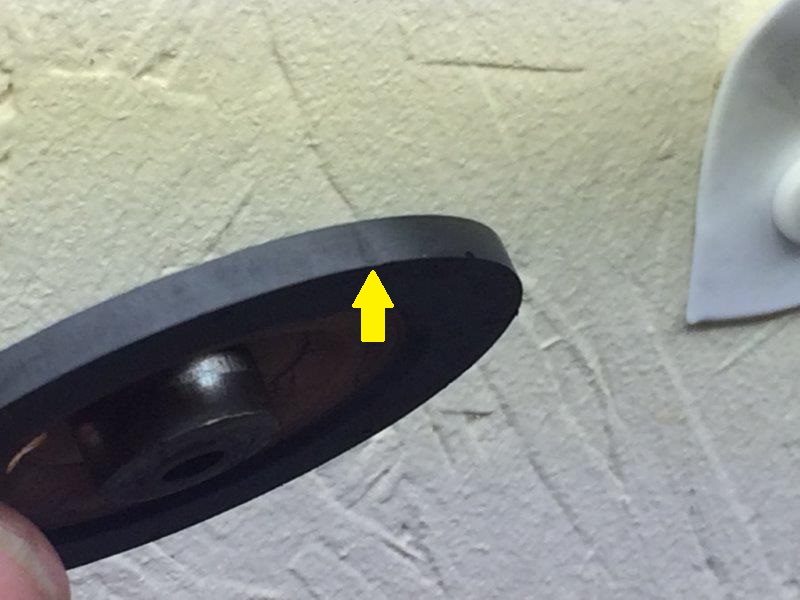
A quick inspection of the rubber idler wheel shows a distinct flat spot where it rested against the motor spindle - probably for the last several decades. This flat spot will cause periodic speed variations and "bumping" noise during playback. The rubber is also rather hard, and has lost much of the "grab" it had when it was new, so slippage will probably be an issue as well - particularly during the record changing cycle. There are services that can "re-rubber" these old idler wheels, and we'll send this one out for renewal.
The factory tag identifying this particular changer as a model 141A (the "A" designates the "Magic Mind" auto-speed-change feature, first offered in this particular model). Changer model identification is extremely important when ordering service literature to help with re-lubrication and proper adjustment.
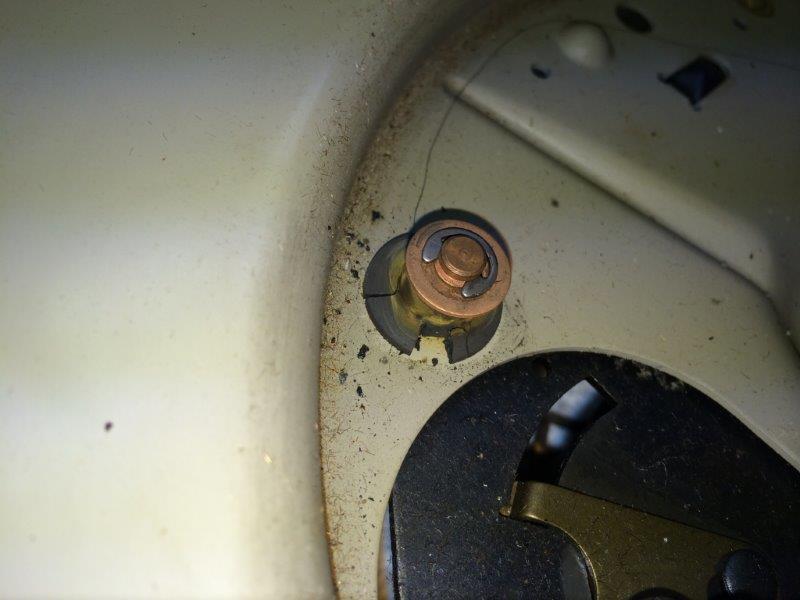
Uh-oh...looks like we'll be needing to order some new motor mounts as well. This one's petrified and doesn't look like it'll last much longer.
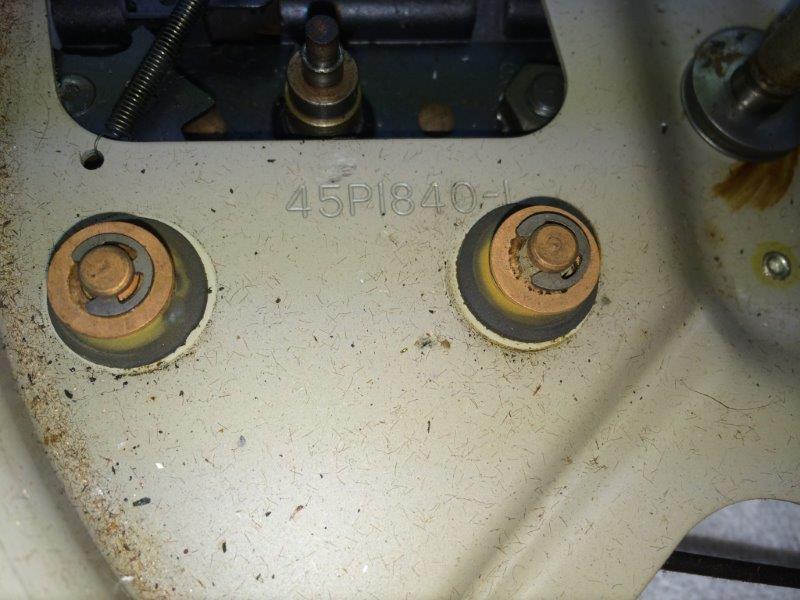
The other two mounts look okay, but if one is failing, these two probably won't be far behind.
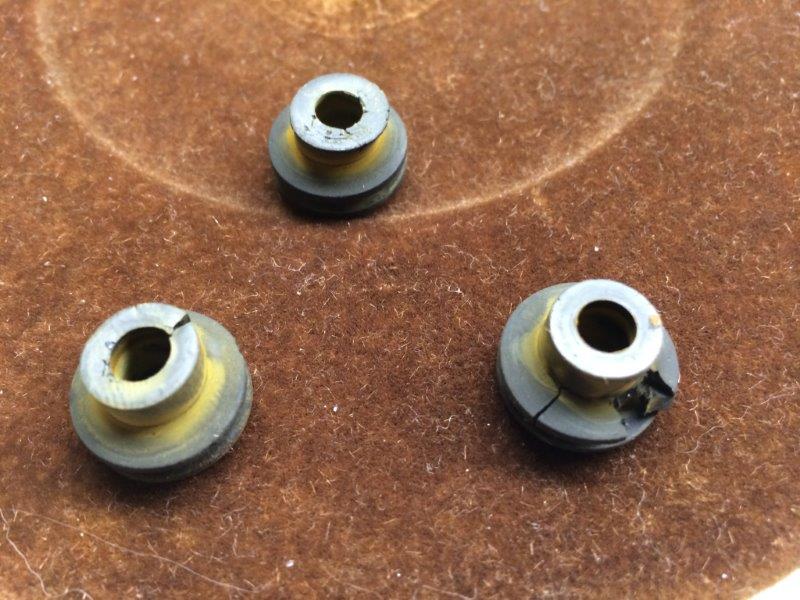
And, as expected, after removing the motor mounts, damage to the other two becomes evident. We'll order replacements, which will serve to isolate the platter from motor vibration and lower the background noise floor to the greatest extent possible.
New motor mounts installed.
After some cleaning and re-lubing, the drive motor assembly is reinstalled into the new motor mounts.
Further inspection uncovers additional issues - here, the speed change linkage arm rubber grommet has deteriorated and needs to be replaced...
...and sure enough, the grommet on the other end of the speed change assembly is missing entirely!
The same linkage after a new grommet is installed. Grommets on both ends of the linkage were refreshed.

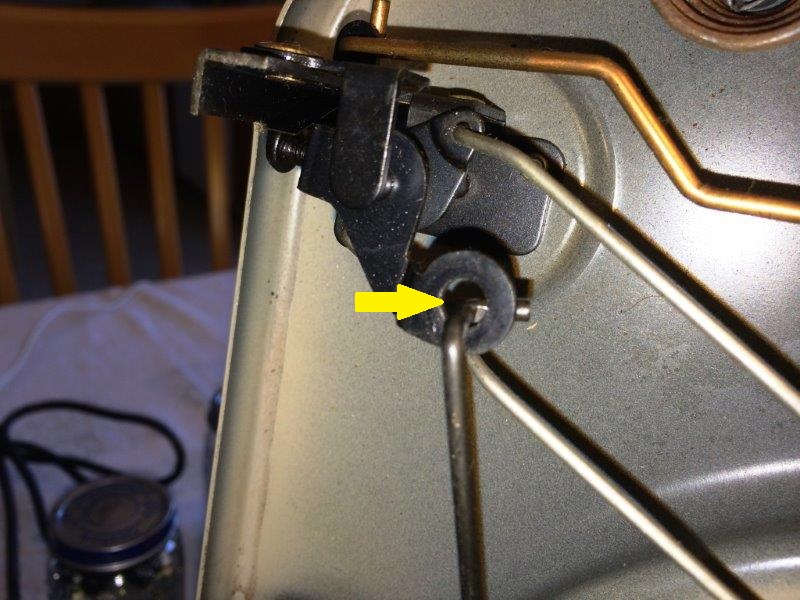
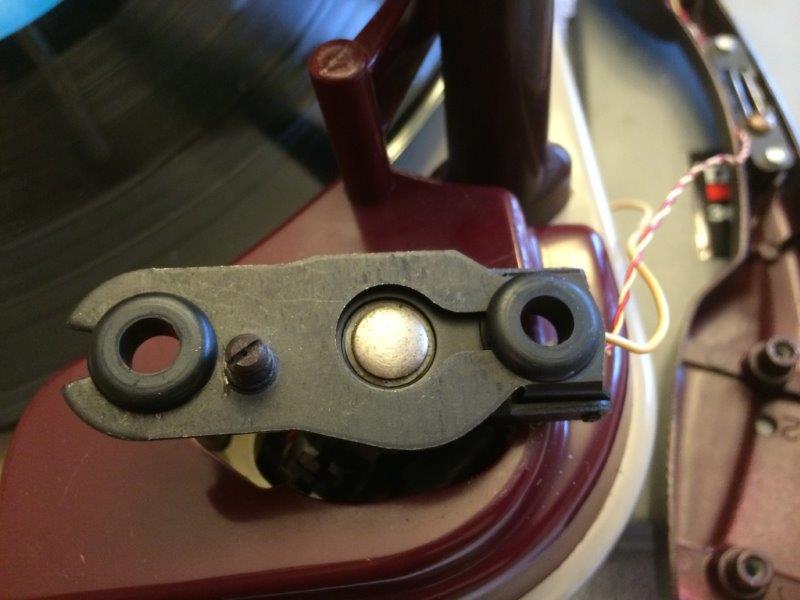
Here, another problem is evident - notice how the plane of the bottom of the tone arm is significantly off-level. This means the needle won't be seated squarely in the record groove, which will affect sound quality and likely cause damage to records. This needs to be addressed before we can do any testing with actual LPs.
This is likely the reason for the tilted tone arm - more damaged rubber grommets. There are two of them, isolating the sensitive tone arm with its associated cartridge/stylus from any residual motor vibration. Most likely, the rubber has broken down as it has on the motor mounts, preventing proper balanced support. Fortunately, the same company who sells replacement motor mounts also sells replacement tone arm grommets. We'll order of few of these as well.
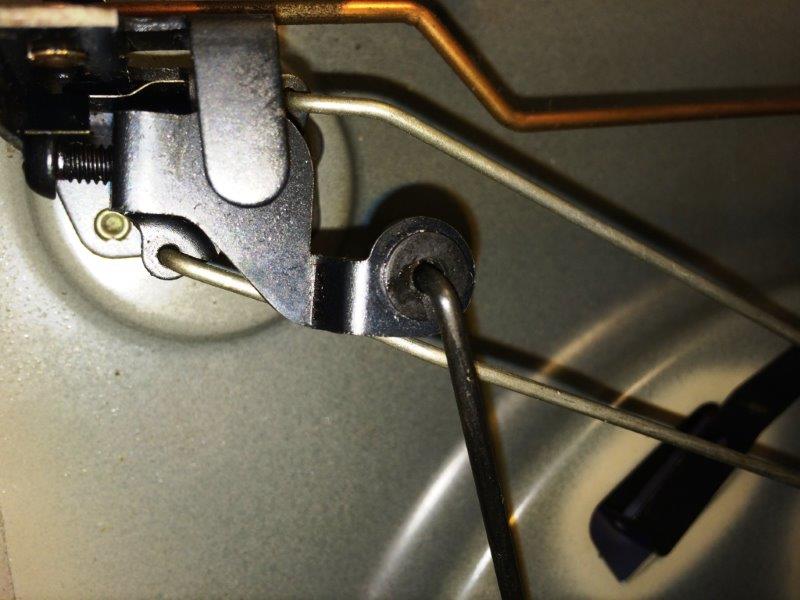
After removing the tone arm assembly, the source of the problem becomes evident. Sure enough, the rubber has degraded and collapsed on the left side, causing the tone arm to sag in that direction.
Fresh replacement grommets are installed...
...and the reinstalled tone arm is now nice and level. Let's see what else needs attention...
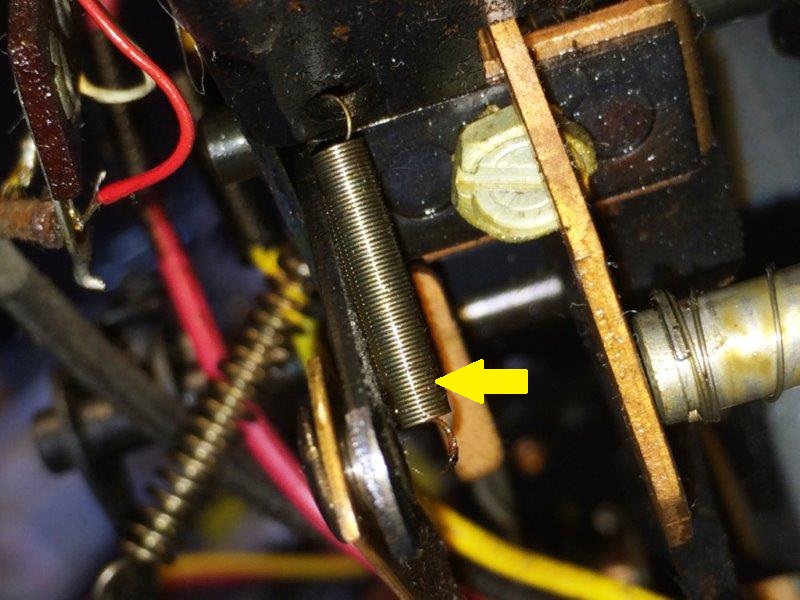
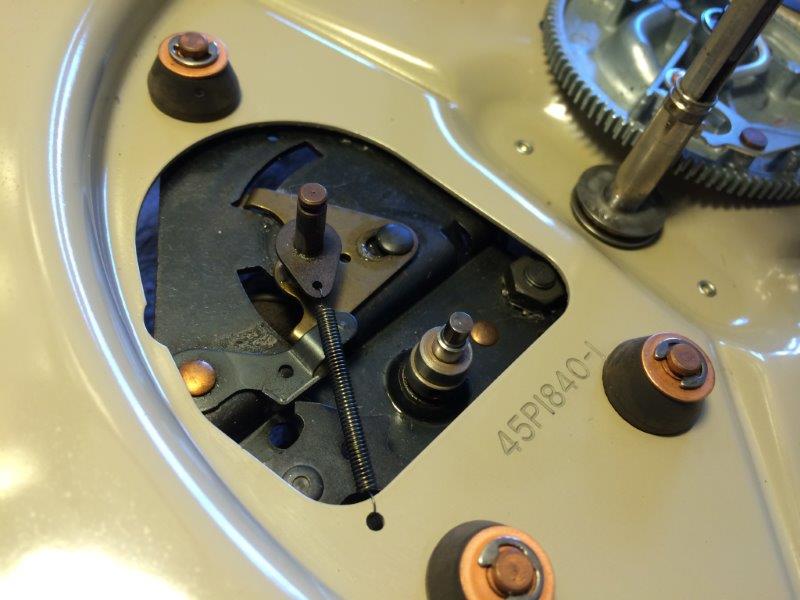
Hmmm - this can't be good - a broken spring just hanging loose. Time to refer to the service literature to find out where it's supposed to be attached...
According to the service info, this appears to be the correct attachment point. Fortunately, the spring was able to be salvaged - it would have been difficult sourcing an exact replacement. It appears that we've addressed all of the obvious visually-identifiable issues, so now it's on to some routine maintenance.
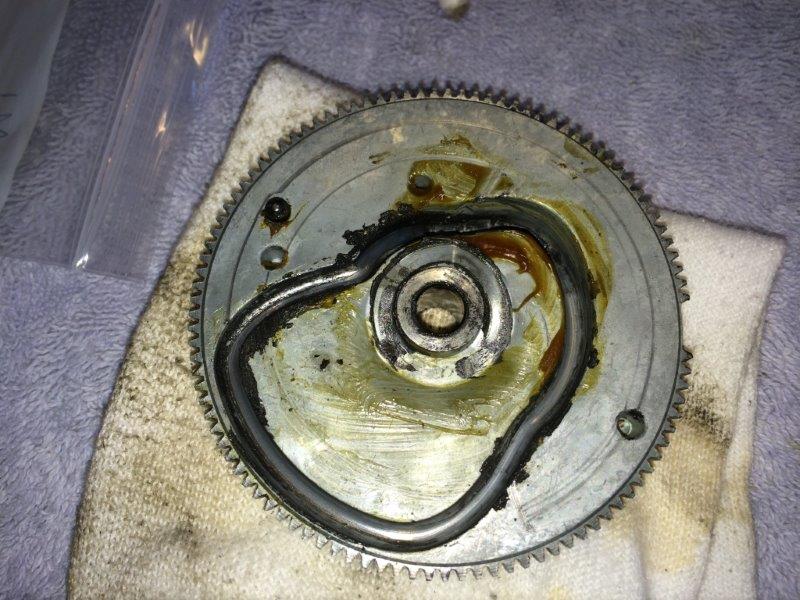
This is the underside of the cam gear used to cycle records and automate reject and shut-off sequences. Over the years, the factory grease has turned to a sticky sludge which must be removed and replaced.
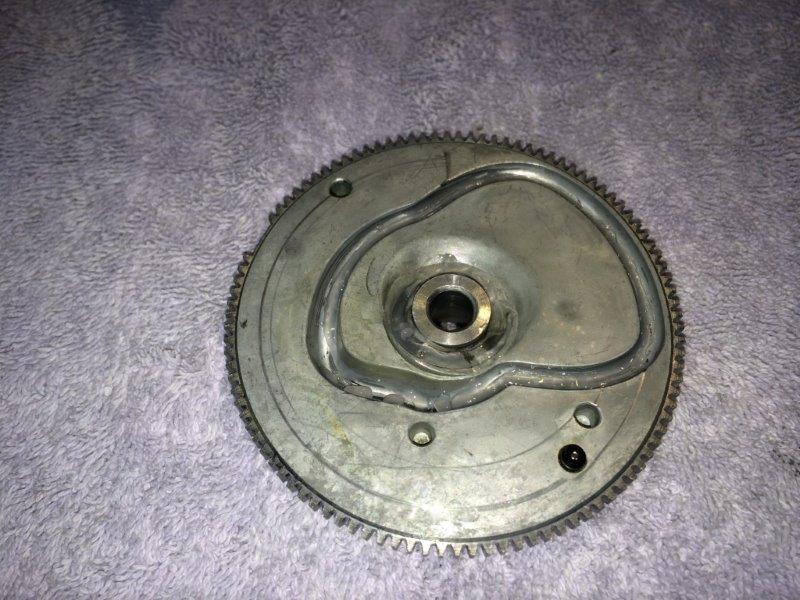
The same cam gear after a thorough cleaning and re-lubing with high-quality silicone-based grease. Should be good for the next 60 years!
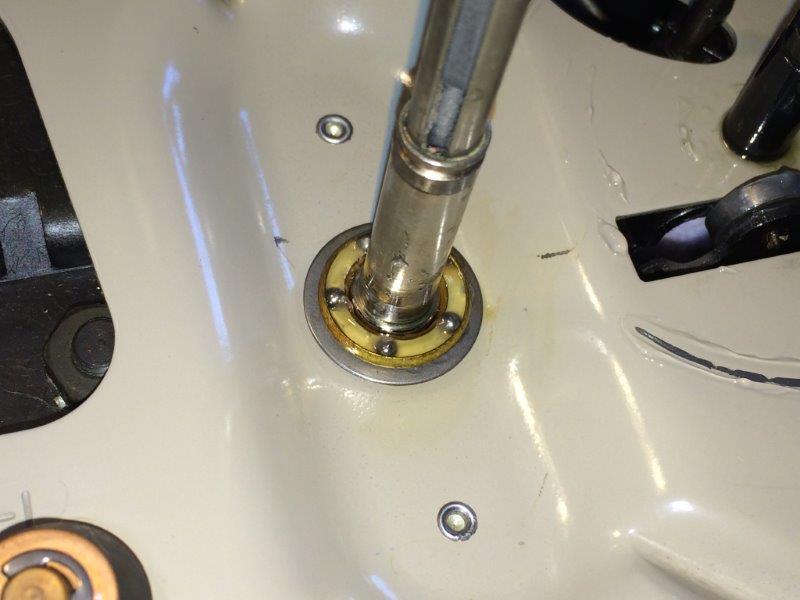
The same gunk is cleaned out of the platter bearing, which is packed with fresh grease and reassembled.
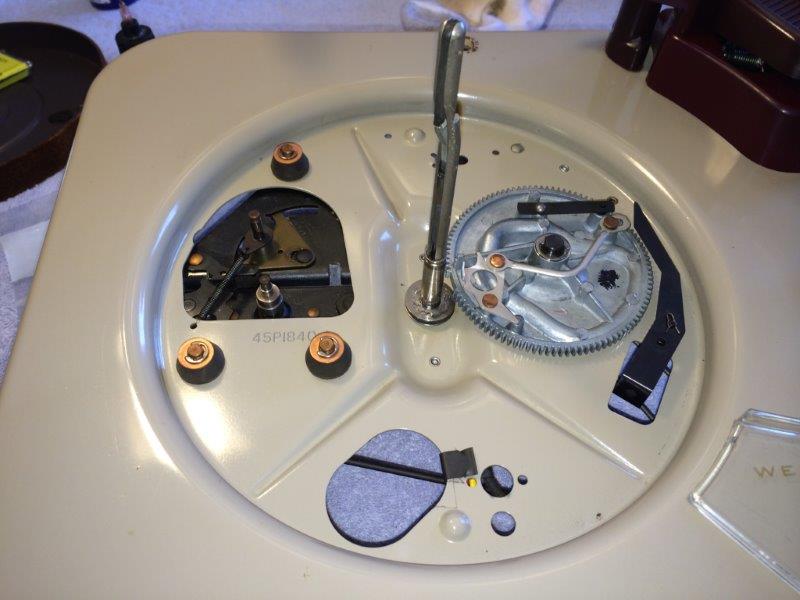
Here's a shot of the cleaned and lubricated record changer assembly, ready for reinstallation of the refreshed rubber drive wheel and platter.
Here's the newly re-rubbered drive, or "idler" wheel. The new rubber is nice and pliable, and perfectly round with no flat spots or deviations. It's definitely worth the trouble getting this part exactly right. But before we reinstall it though, we need to make sure the inner edge of the platter is free of any grease/oil or other contaminants.

Here then, is the inner lip of the platter, the surface that will be driven by the new idler wheel. As you can see, it's pretty dirty, probably from a build up of decomposed rubber from the old idler wheel. 90% isopropyl alcohol should clean this right up and remove any grease or oil that could cause slippage and affect accurate speed control.
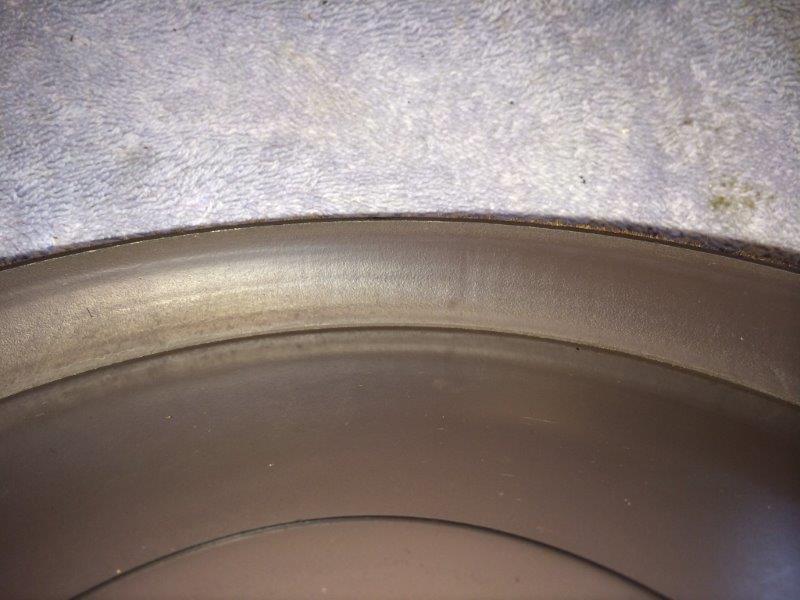
Here's the inner platter edge after a thorough cleaning. At last, we're ready for reassembly of the idler wheel and platter..
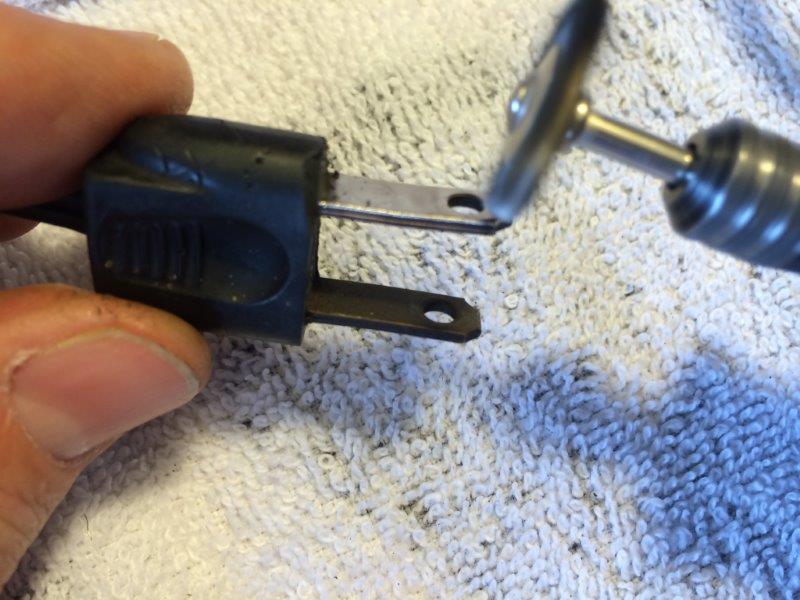
Details matter. Here, we're wire-wheeling off oxidation on the brass AC plug prongs. A good, low-resistance connection to the power source is an important consideration for performance and safety.
Here's the original phono pickup - the GE RPX "triple-play" variable reluctance phono cartridge. A "moving iron", or "magnetic" design, the RPX was considered to be THE top-of-the-line phono cartridge back in the mid-fifties, when cheaper ceramic or crystal pickups were the standard. Unfortunately, this cartridge cannot be used to play modern stereo LPs because (1) it has no "vertical compliance", and (2), it's designed to track records with a stylus pressure of approximately 10 grams. Since stereo record grooves have both side-to-side and up-and-down components, a cartridge with no vertical compliance quickly carves out the hills and dales in the groove, causing loss of stereo information. Moreover, modern records are designed to be played with stylus pressures under 3 or 4 grams, so the RPX's 10-gram tracking pressure would accelerate modern record groove destruction. The RPX is a great cartridge for pre-1960's mono LPs and 78s, but certainly not for modern stereo vinyl. So - we need to find and install a more universal cartridge.
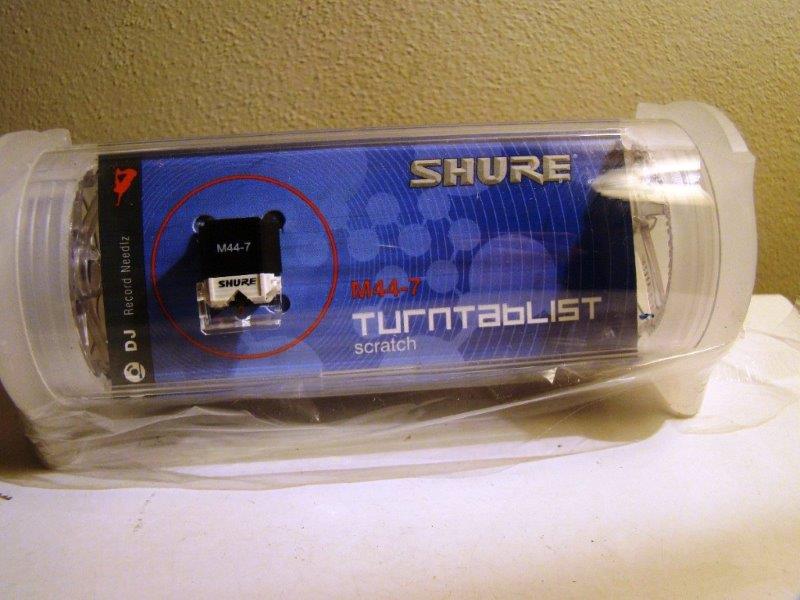
This is our new cartridge - a modern Shure M44-7. It's actually the cartridge of choice for many present-day DJ's as it is very durable, and can handle record "scratching" effects without being damaged. It's a magnetic design like the original RPX, and therefore has similar equalization requirements. The M44-7 also has a very high output voltage, almost as high a the RPX, so electrically, it's almost a perfect match. As it's a stereo cartridge (which we're jumpering for mono output), it has the vertical compliance to play modern stereo LPs without damaging them, and with a recommended tracking pressure of between 1 and 3 grams, it tracks heavily enough to be used with a record changer, yet not so heavy as to prematurely wear out delicate modern records. To top it off, the LP stylus is removable and a specialty stylus may be easily inserted for playback of 78 RPM records.
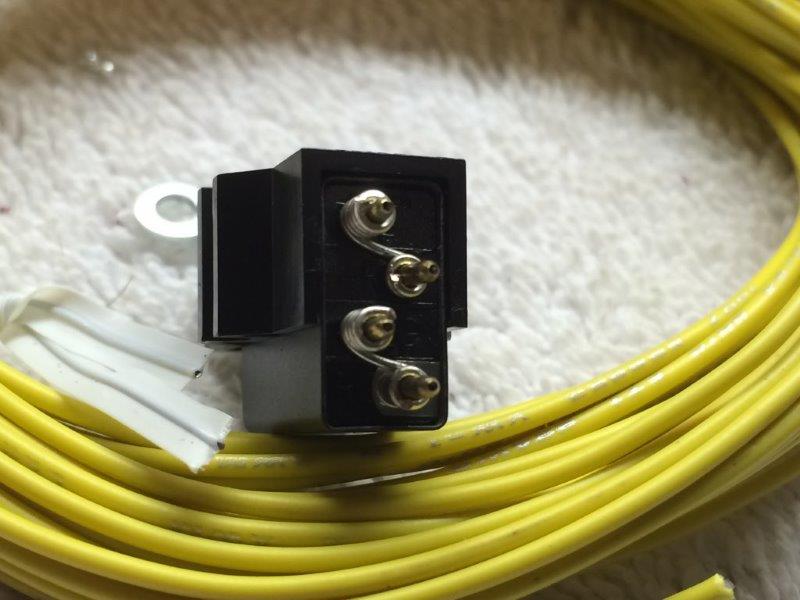
This shot shows the stereo connections on the back of the new cartridge, jumpered for monophonic output.
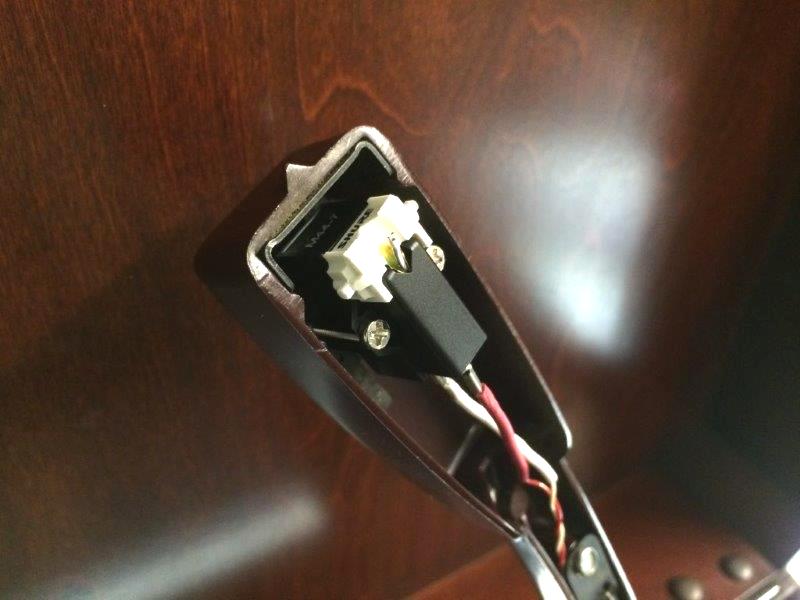
The new Shure cartridge is installed in the tone arm...
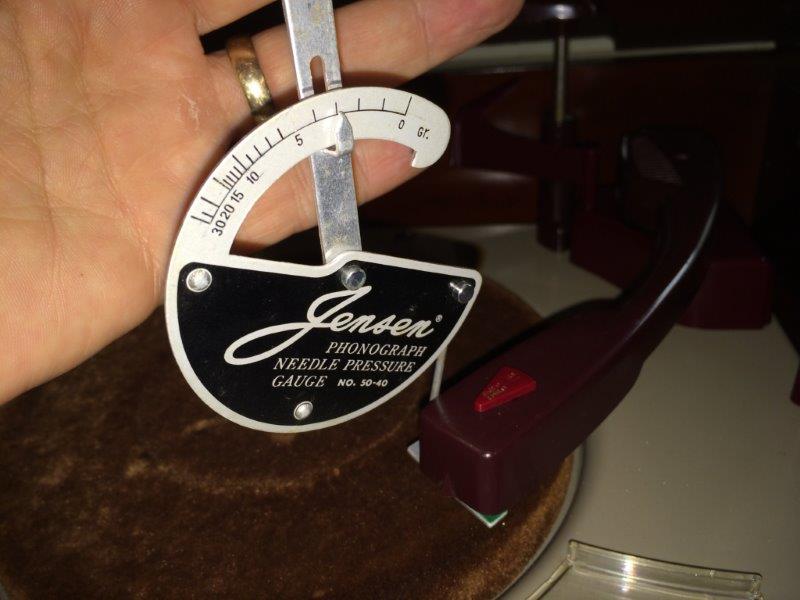
...and the stylus tracking pressure is set for approximately 3 grams, which provides good skip-free tracking with the Webcor's high-mass tone arm while still minimizing record wear.
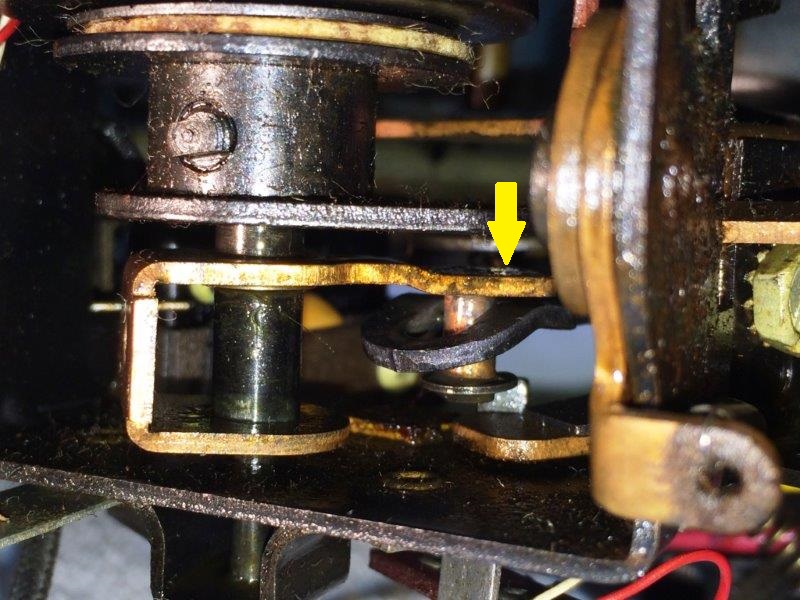
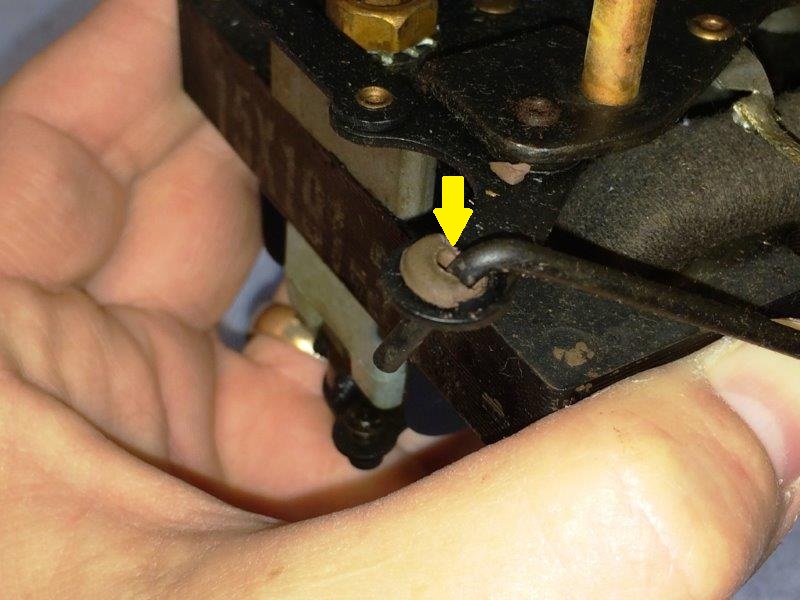
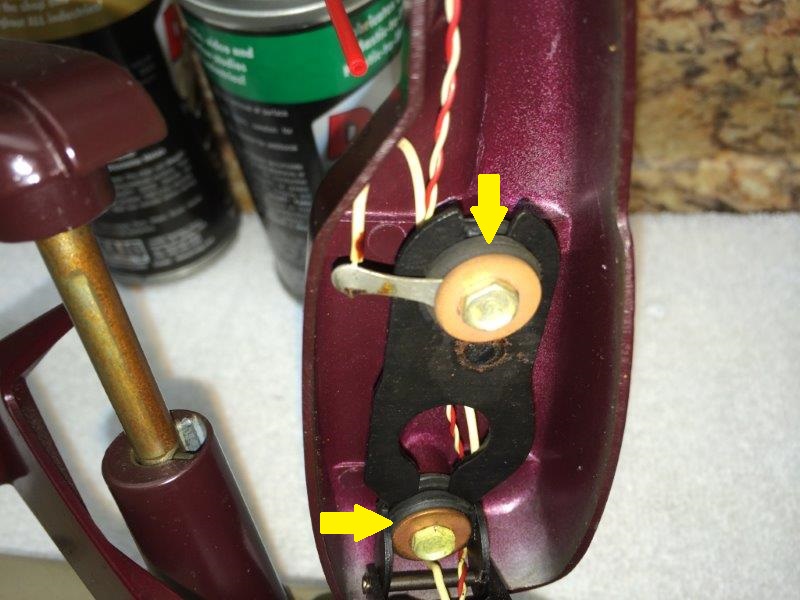
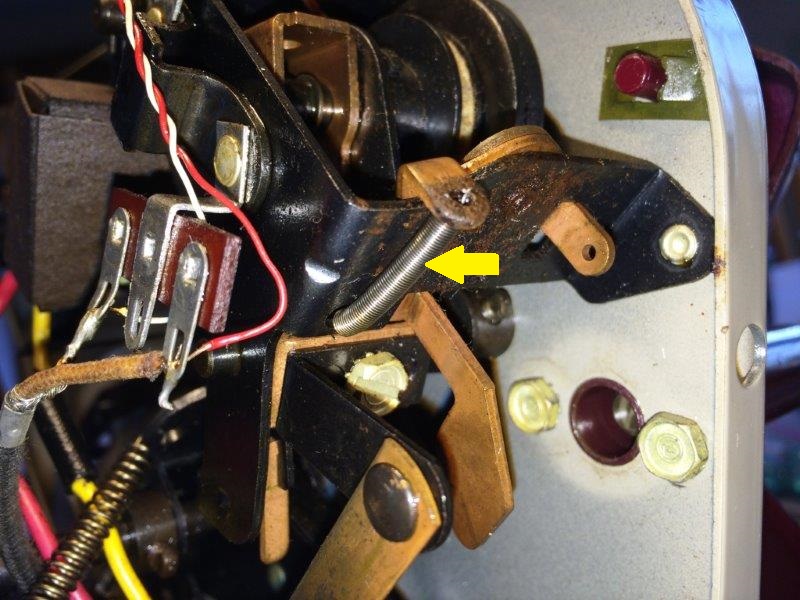
So, after some initial testing with records, another problem that became immediately evident was that the tone arm was not moving properly during change/reject cycles - in fact, it wasn't doing much of anything. After referring to the service literature and re-inspecting the tone arm linkage assemblies, it was discovered that the previous owner had apparently applied some kind of spray lubricant to any and all parts associated with tone-arm movement. Unfortunately, certain surfaces in the tone arm linkage MUST remain oil-free, as they act as a clutch mechanism to properly move the tone-arm throughout the record changing and reject cycles. There is a friction pad that facilitates this clutching process, and the adhesive that holds it in place had been completely dissolved by the excessively applied lubricant. Consequently, the pad had fallen off and was missing, which explained the lack of proper tone arm motion. The above arrow points to the place where this friction pad should have been mounted.
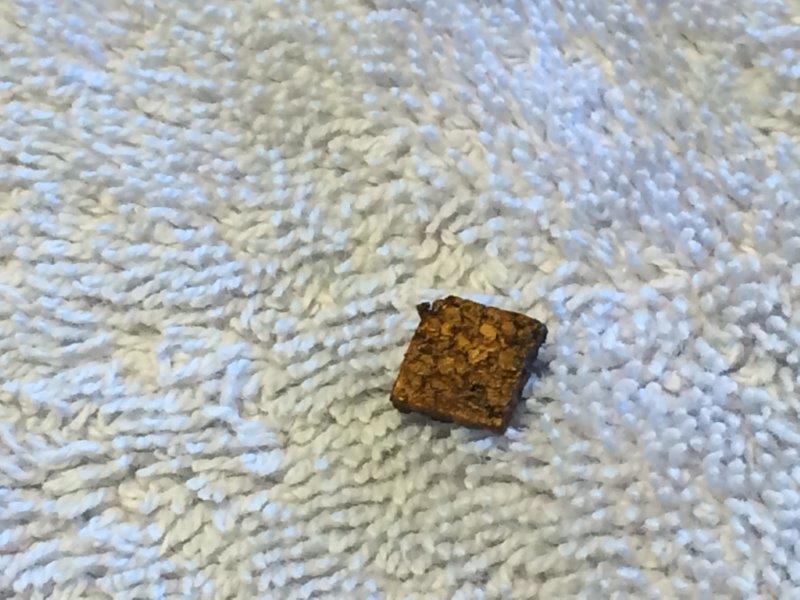
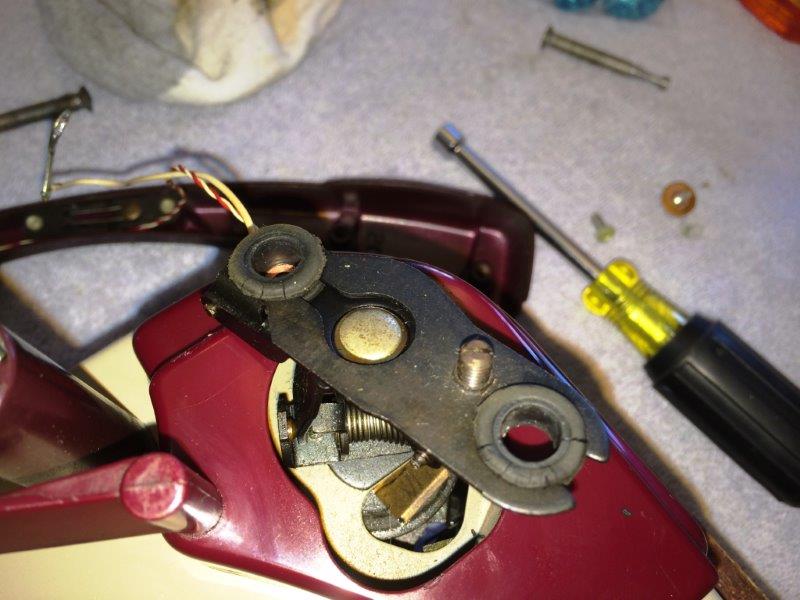
Well, look what fell out after the tone arm assembly was removed - the missing friction pad! Apparently made out of cork, it was petrified after almost 60 years, and completely soaked with oil.
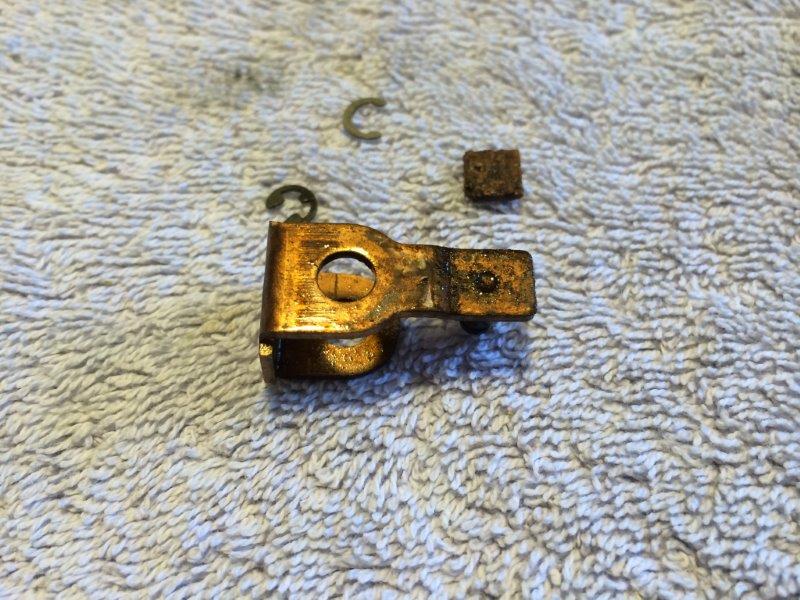
Here's a shot of the oil-soaked clutch bracket, to which the friction pad should have been attached.
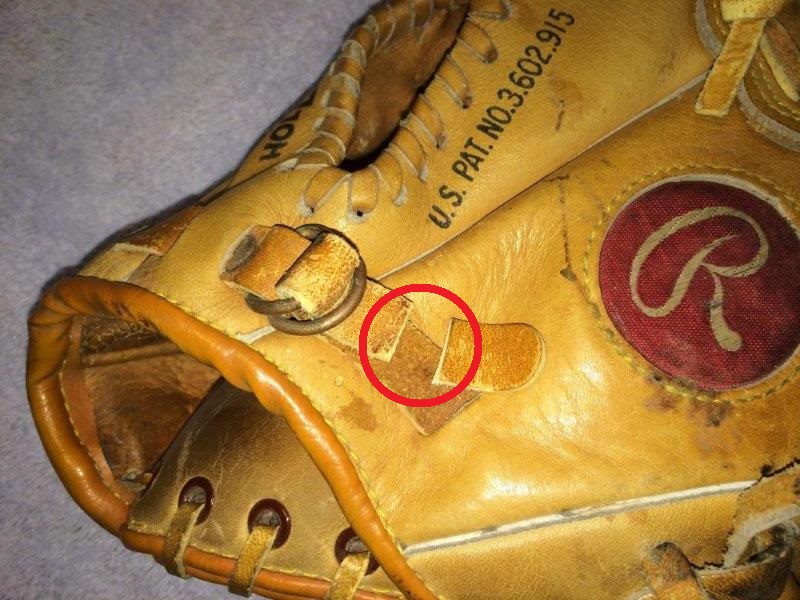
So - the next order of business is to de-grease the clutch bracket and fabricate a new friction pad. Leather generally being a more durable choice for this purpose than cork, some spare strapping from my old first-basemen's glove was selected as the donor material. The circled area above shows the section from which the selected leather was removed.
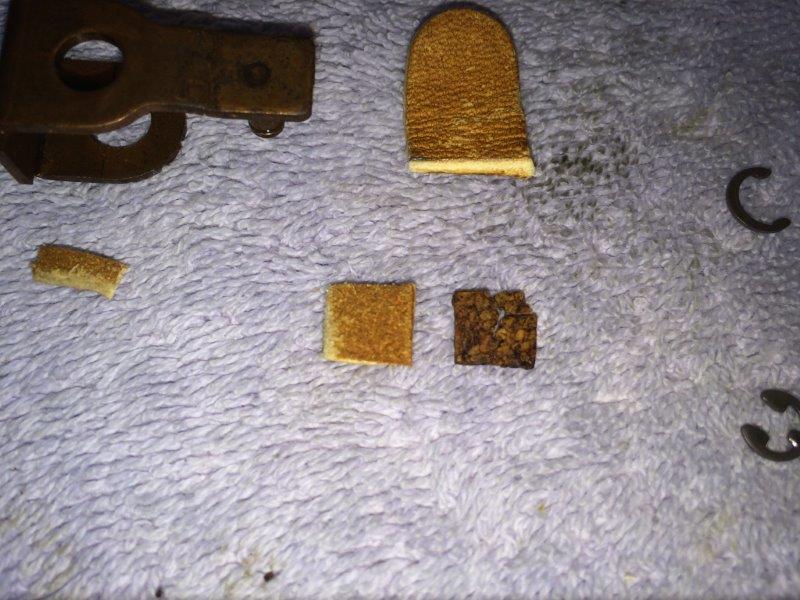
The replacement leather pad, cut to size, next to the original cork pad.
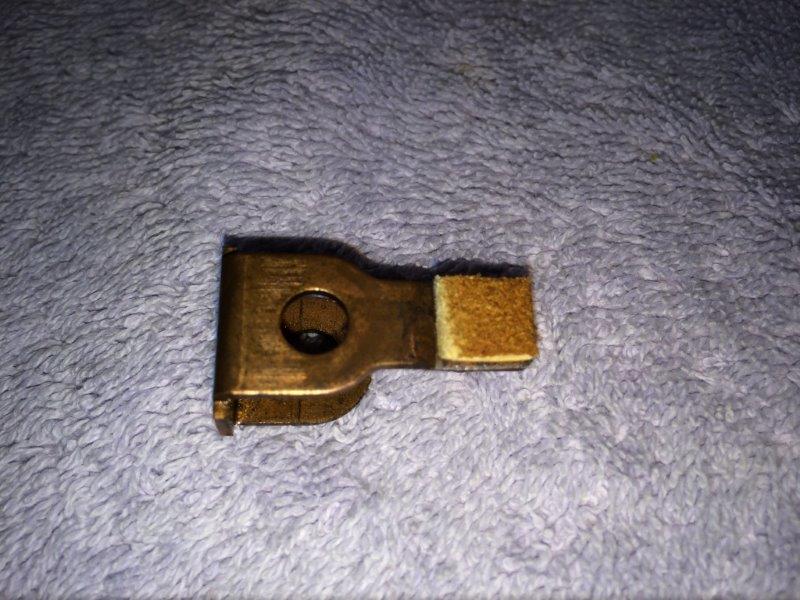
The clutch plate was thoroughly degreased using isopropyl alcohol, and the new leather pad was adhered with double-sided contact tape. Obviously, the mating clutch surface in the tone arm assembly was degreased as well, and after putting everything back together and making some fine adjustments, the tone arm now operates perfectly.

Unfortunately, further testing identified yet another issue - one of the large 6" woofers was outputting poor quality, distorted sound - particularly at lower listening levels. The other two speakers sounded fine, eliminating the possibility of a problem with the amplifier, so it became apparent that the woofer needed to be replaced. A physical inspection of the speaker showed that the edge of the cone had worn very thin, and was beginning to crack.
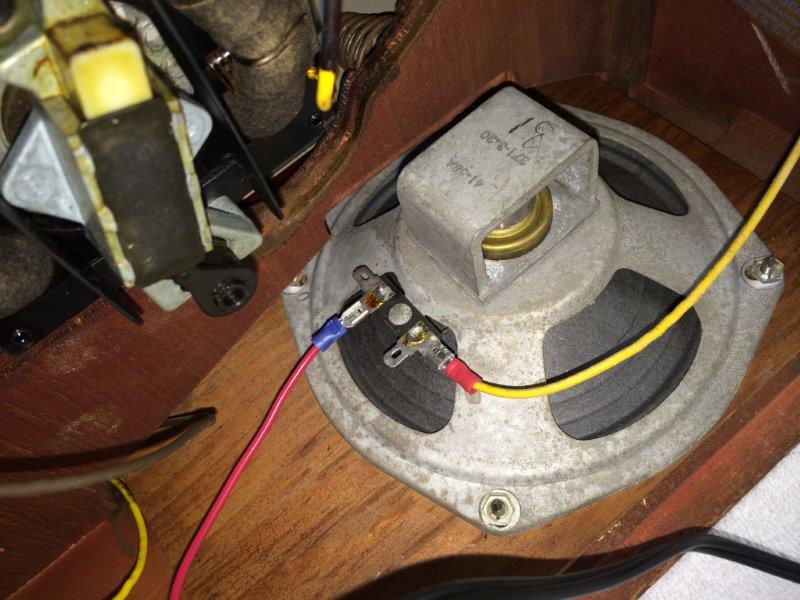
As this player utilizes matched woofers connected in a series arrangement, it was important that both 6" woofers were replaced, not just the defective one. Fortunately, a suitable vintage pair with the proper fit and impedance rating became available, and was installed. Here's the replacement left side speaker...
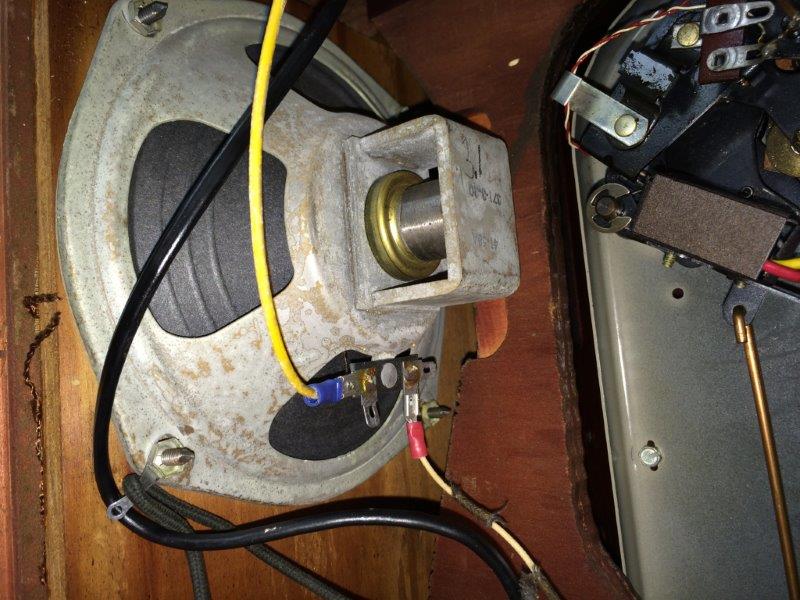
...and here's the right. According to the stamped EIA codes on the speakers, these appear to have been manufactured by the "Best Corporation" in May of 1963.
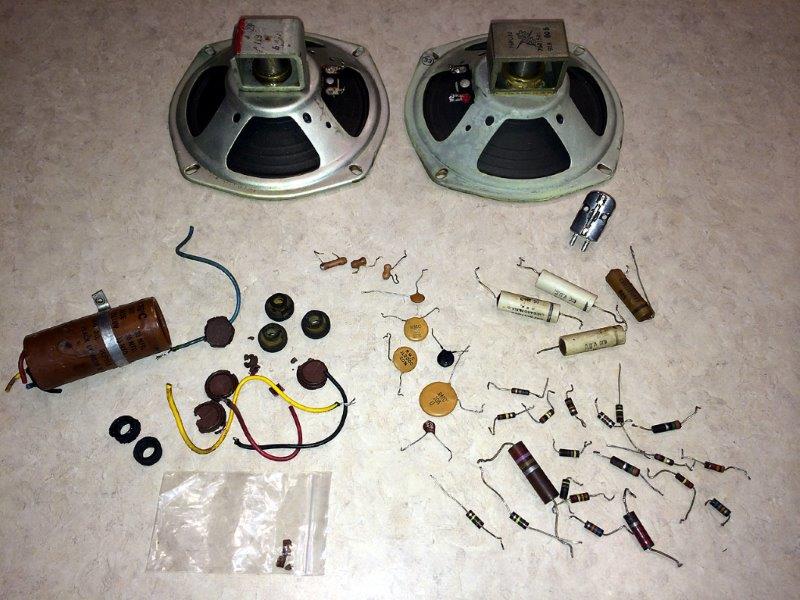
Here then, is a shot of all the parts that have been replaced during the restoration, including speakers, grommets, phono cartridge, and virtually every component originally on the underside of the amplifier.
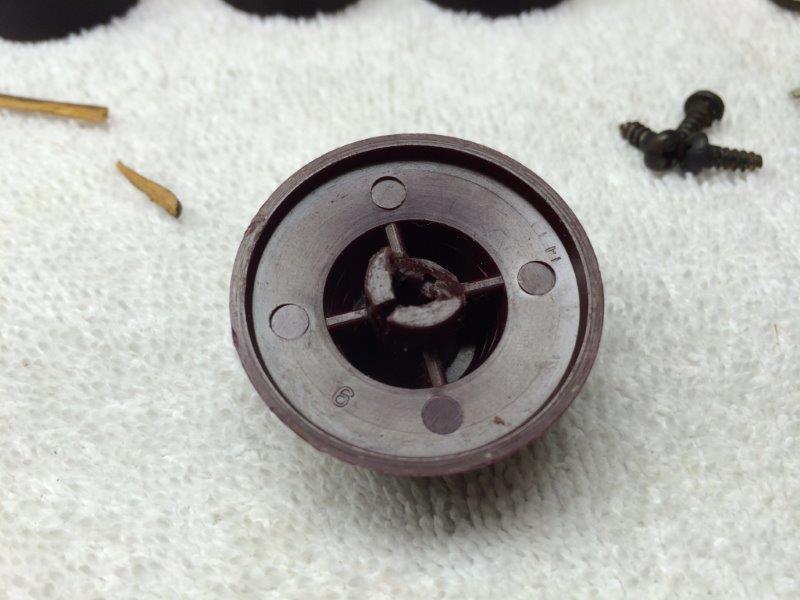
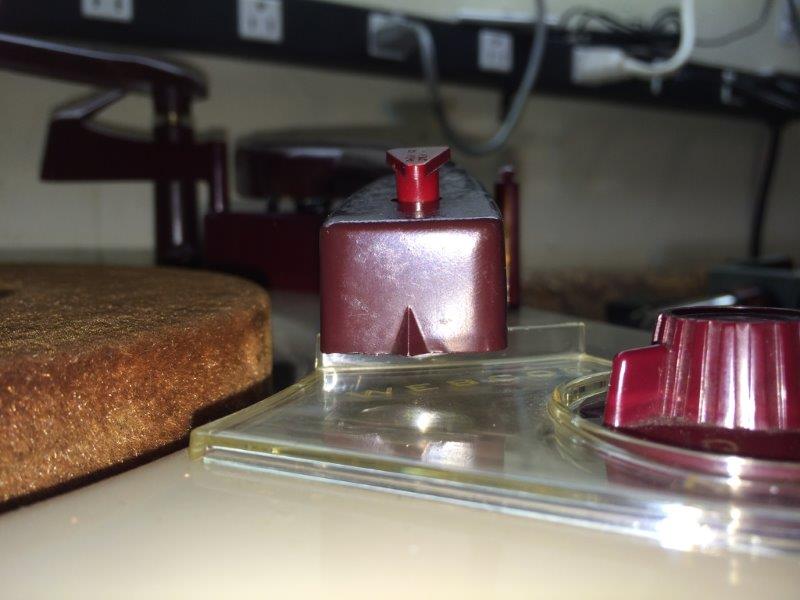
Alas - another problem to address - the speed change/cycle/reject knob is damaged and needs to be repaired. Unfortunately, this is a unique part to this model, and replacements are unavailable - even through eBay. So, we need to figure out how to build the damaged section back up so it can fit properly back on the shaft, and handle the rotary force necessary to change speeds.
The center hub of the original knob is drilled out to accommodate a replacement shaft hub from a donor knob.
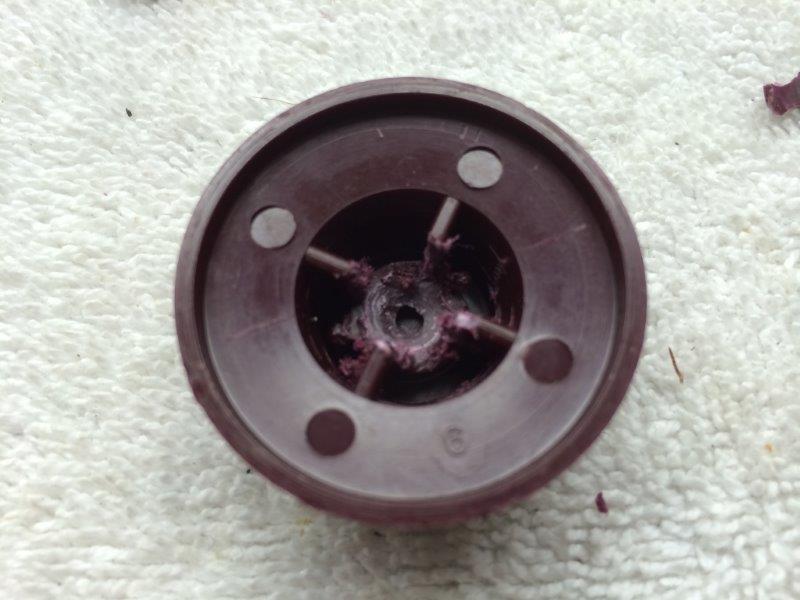
Here's the donor knob, with its shaft mount hub removed. This is a brand new generic car dashboard replacement knob purchased from an auto parts store.
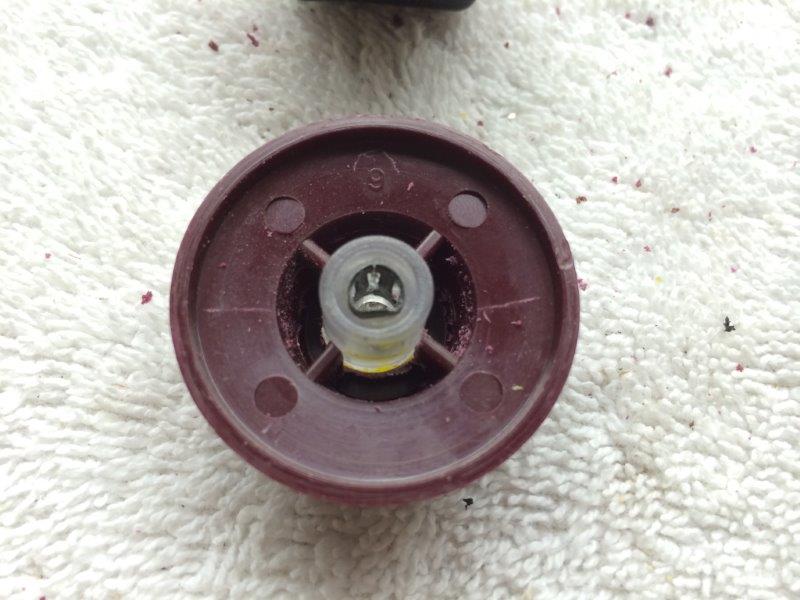
The donor hub is fitted into the original knob. The light score marks on either side of the hub mark the position of the flat index of the shaft.
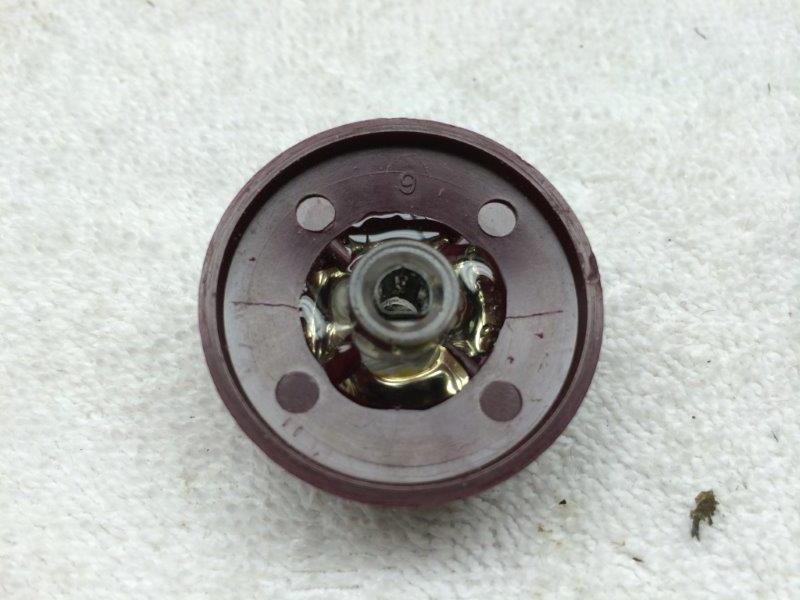
Finally, the new hub is securely glued in place. This arrangement should be good for at least another 60 years!
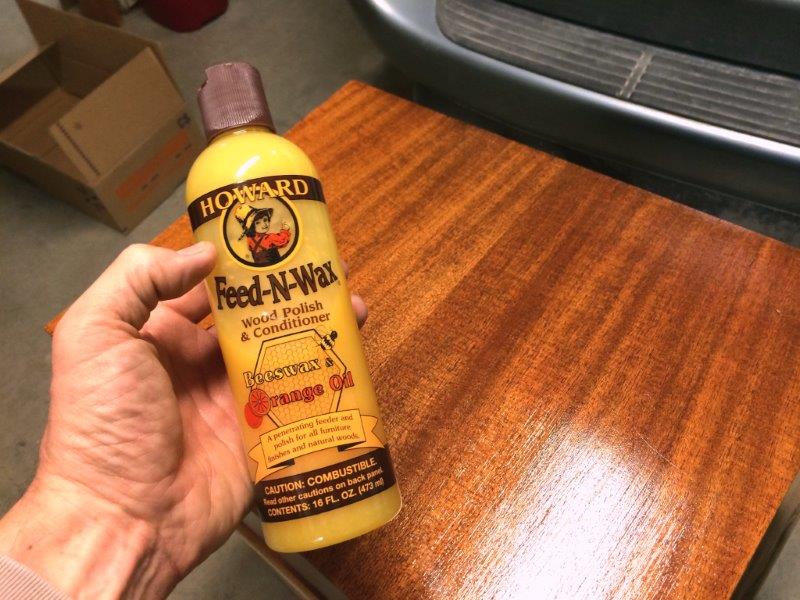
Before we put everything back together, it's time for some attention to the cosmetics. A liberal coating of Howard's Feed-N-Wax is applied to all finished surfaces of the cabinet and allowed to soak in overnight. Feed-N-Wax protects and imparts a beautiful luster to the mahogany by restoring natural oils and emollients. A quick buffing with a soft well-laundered cotton cloth completes the process.
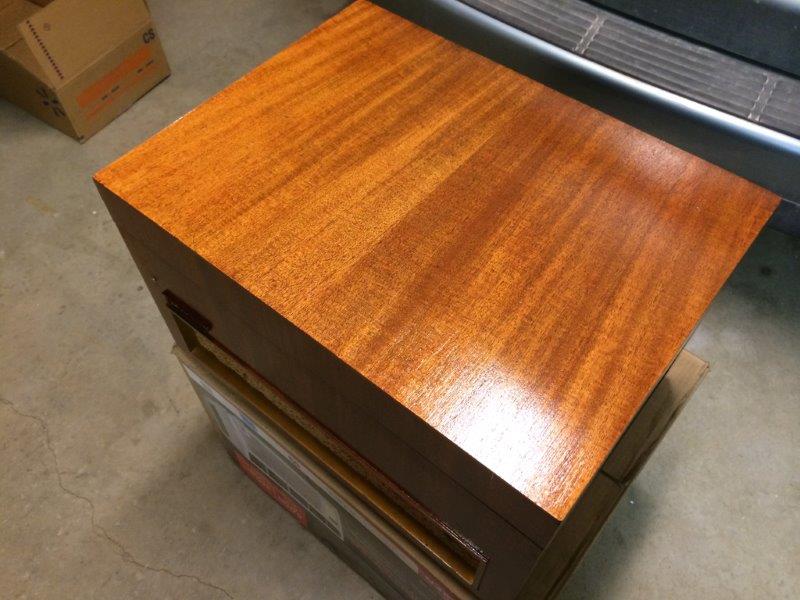
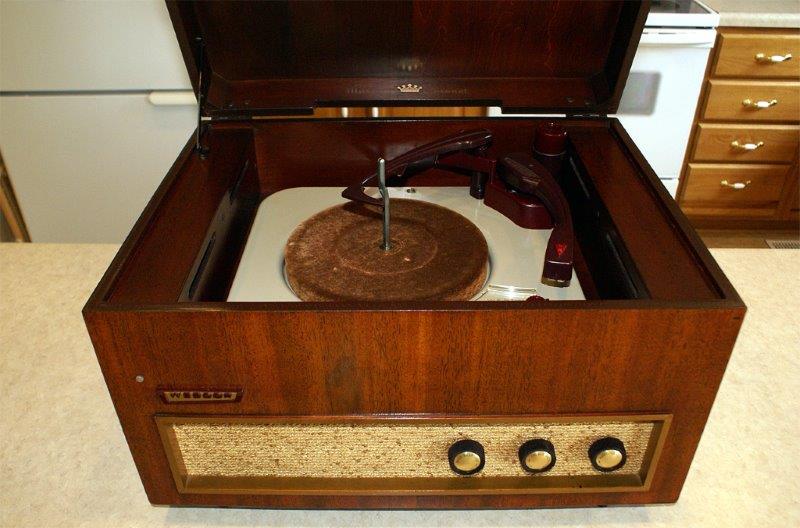
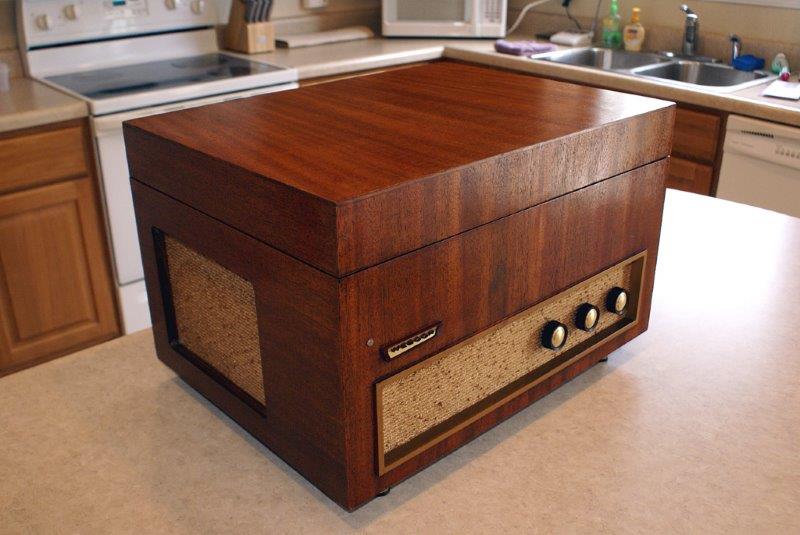
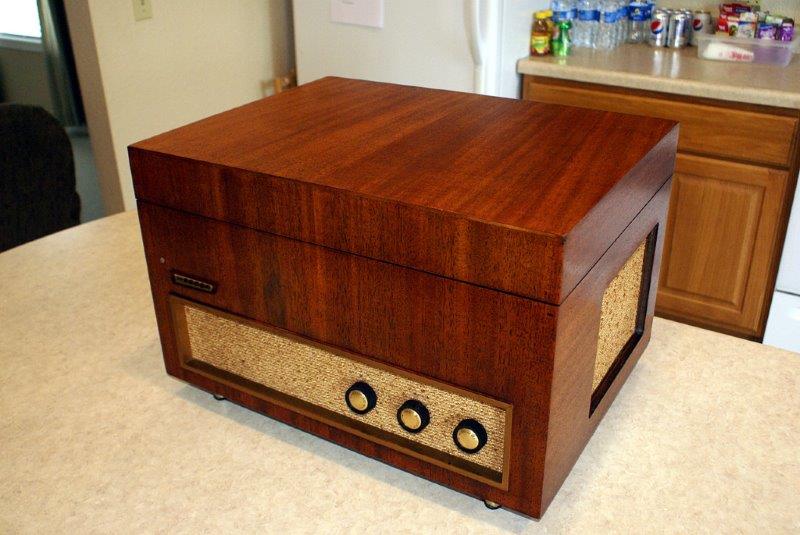
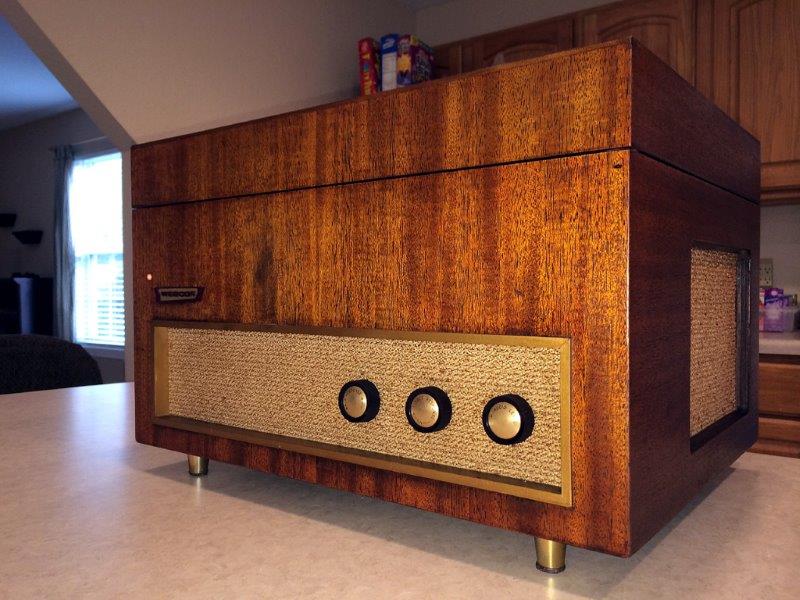
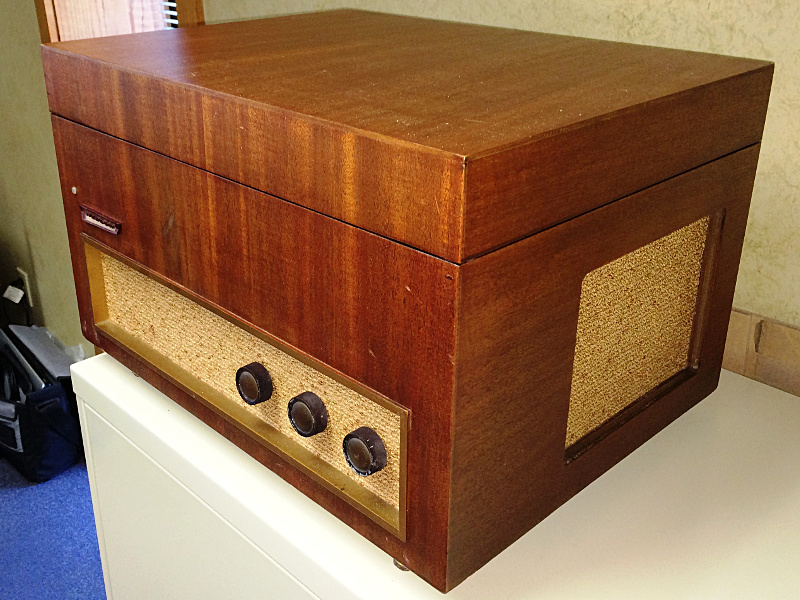
Another shot of the player, showcasing the lovely grain of the mahogany and the remarkable state of preservation of this near-60-year-old cabinet.
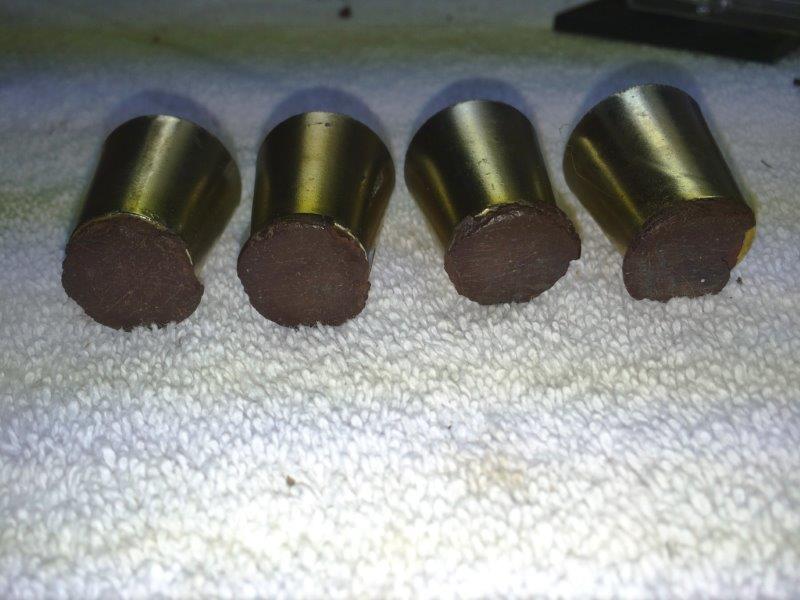
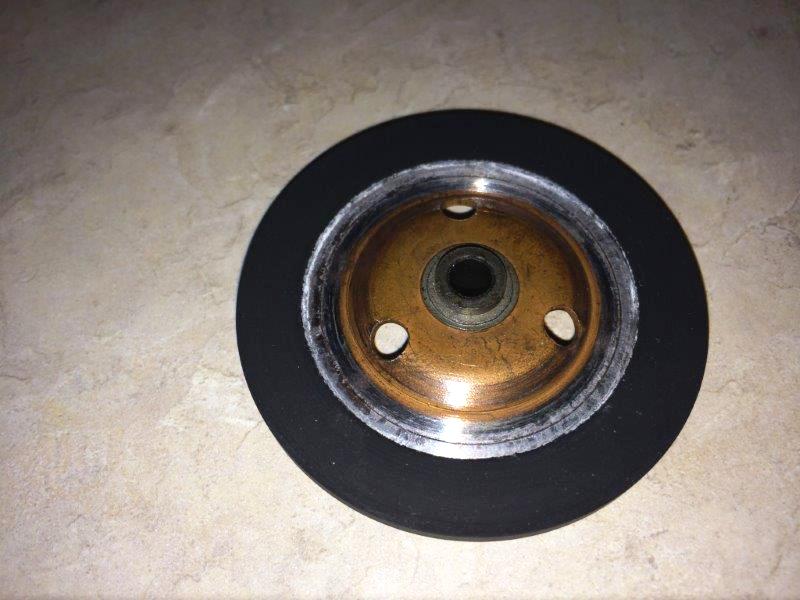
The rubber foot pads have become hard as rock over the years and are beginning to chip and crack. As these could cause damage to delicate surfaces, we'll replace them with some nice felt replacement pads.
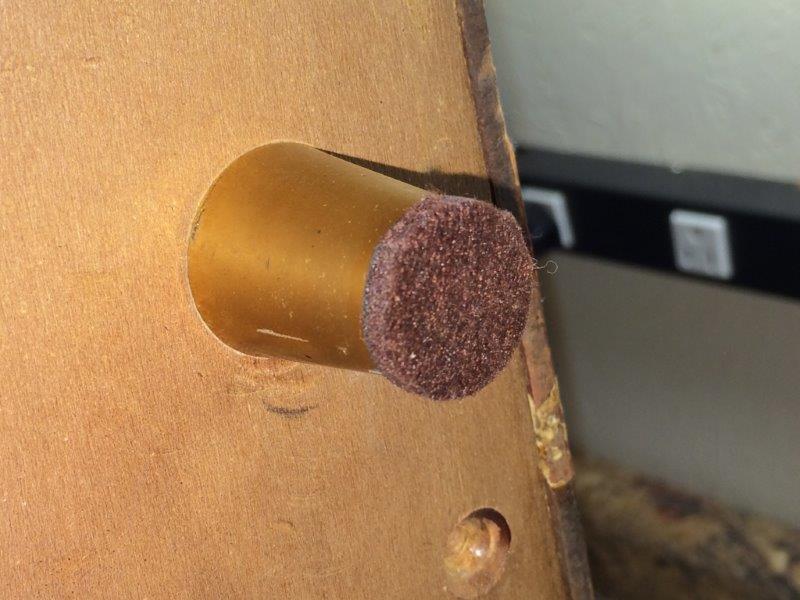
One of the felt foot pad replacements. These new pads also serve to further isolate the record player from external vibrations that could affect sound quality.
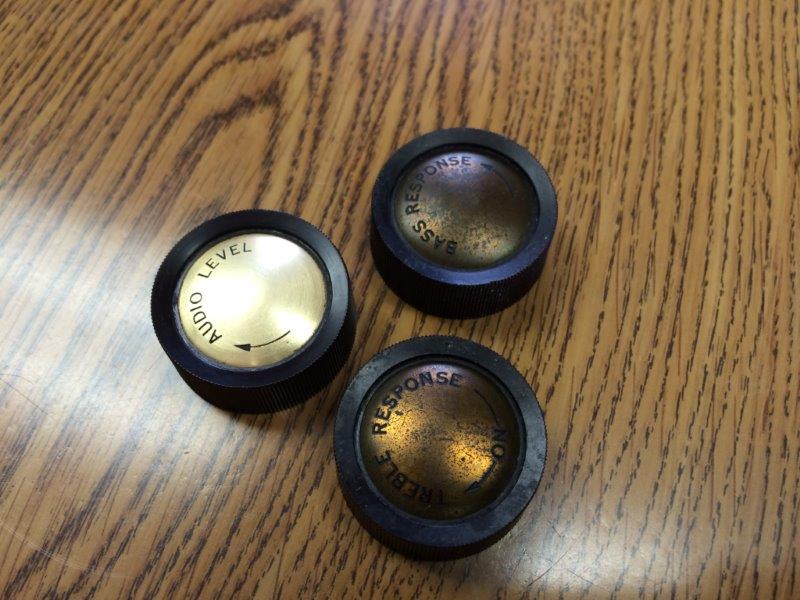
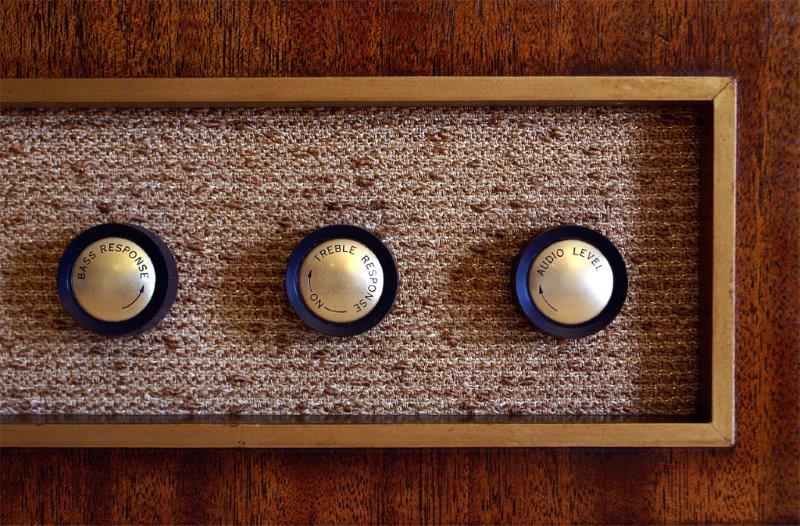
As a final touch, the knobs are cleaned and polished. Note the difference between the restored "Audio Level" knob and the other unrestored knobs.
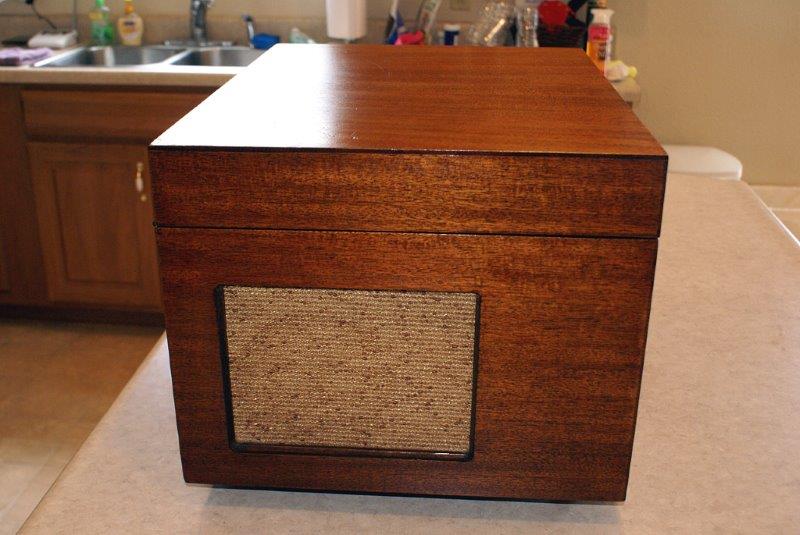
So, that completes the electrical, mechanical, and cosmetic restoration of this lovely vintage Webcor record player. Here are some glamour shots of her before she goes off to her new home: